
Why Straight, Square Cuts Matter for Makers
A laser is only as accurate as its geometry. When the bed is out of square or the beam path has drifted, even a perfect design file comes out with gaps at the corners, frames that lean, and boxes whose lids refuse to close. For gift makers, Etsy sellers, and sign shops, that kind of error turns a five-minute job into a frustrating re-cut. The good news is that most of these problems are mechanical, not electronic, and you can fix them with simple hand tools and a patient afternoon.
This guide walks through the practical steps to calibrate laser cutter geometry and square the work area so your cuts land where you expect them. We will cover the bed, the gantry, the beam path, and a final test cut that proves the machine is honest before you commit a sheet of good material. Whether you run a compact M4060E Cyclone or a larger CM1390E Elite, the principles below apply to nearly every entry-level and mid-size CO2 flatbed.
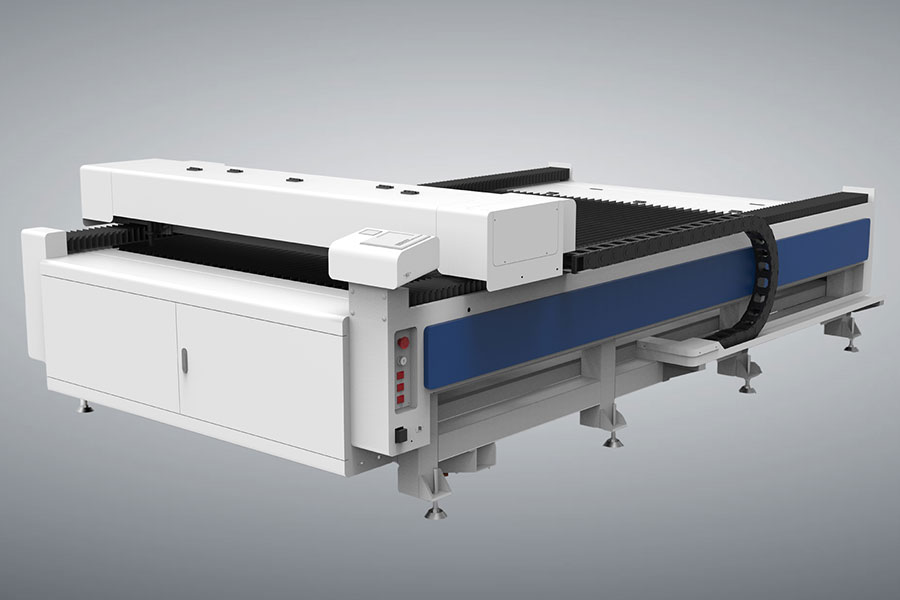
Start With a Clean, Level Bed
Before you touch any bolts, clean the honeycomb or knife bed and the surrounding rails. Residue from acrylic and wood smoke builds up faster than most people expect and can throw off a square reference. Wipe the rails with a lint-free cloth and a light machine oil, then remove stray offcuts from the bed so nothing is flexing the surface.
A flat reference is the foundation of laser bed calibration. Place a known-straight steel ruler or a machinist's square flat on the bed and look for rocking. If the bed rocks, shim it or adjust the leveling feet until it sits flat front to back and side to side. A warped or tilted bed will make every measurement after this step meaningless, so do not rush it.
Square the Gantry to the Bed
The gantry is the bridge that carries the laser head left and right as the bed moves front to back. If the gantry is not perpendicular to the side rails, your cuts will be parallelogram-shaped instead of rectangular. Most Redsail flatbeds let you loosen two bolts on one side of the gantry and pivot it slightly.
Use a framing square or the "measure the diagonals" trick: mark two points near the front corners of the bed and two near the back, then measure the distance from front-left to back-right and from front-right to back-left. When those two diagonal measurements are equal, the gantry is square. Tighten the bolts, re-measure, and only move on once the numbers match within about a millimeter across the full width.
Check Belt Tension and Pulley Alignment
Loose or uneven belts are a sneaky cause of crooked cuts. A belt that is tighter on one side pulls the head off its true path, so a rectangle can come out with one long edge and one short edge even when the gantry looks square. Press gently on each belt mid-span; it should deflect only a little, roughly the thickness of a fingernail, and feel even on both axes.
While you are there, confirm the drive pulleys sit flush on their shafts and that the set screws are tight. A pulley that has slipped a few degrees will shift every cut in the same direction, which looks like a design error but is purely mechanical. Snug the grub screws with the proper hex key and mark the shaft with a tiny dab of paint so you can spot future creep at a glance.
Align the Laser Beam Path
Laser alignment is the step makers fear most, but it is methodical rather than difficult. The goal is to have the beam hit the center of every mirror and the center of the lens so it exits the nozzle exactly on the focal point. Start with the machine off and the tube unpowered for safety, then place a piece of masking tape over each mirror and fire a low test pulse at low power.
Rotate the head through several positions and compare where the burn marks land. If the spot walks toward one edge as the head moves, nudge the corresponding mirror with its adjustment screws until the marks stay centered at every position. Work mirror by mirror, from the tube to the head, and finish by centering the beam in the nozzle. Proper alignment is what keeps the kerf consistent so straight laser cuts stay the same width from one end of the sheet to the other.
Verify Focus and Nozzle Centering
Even a perfectly squared machine cuts poorly if the focus is wrong or the beam is off-center in the nozzle. Set your focus for the material thickness you actually cut, not the thickness you wish you had, using the supplied focus tool or a ramp test on scrap. A lens that is 1 mm out of focus can turn a crisp edge into a melted, ragged one.
Then confirm the nozzle is centered on the beam. A simple check is to lower the head close to a scrap piece, fire a low pulse, and see whether the burn sits in the middle of the nozzle hole. If it is off, loosen the nozzle collar and adjust. Centering matters because an off-center beam produces an angled kerf that makes corners look square on top but beveled underneath, which is exactly the kind of defect that ruins tight-fitting joints.
Run a Squareness Test Cut
Calibration is not finished until the machine proves itself on material. Draw a simple square and a rectangle in your software, size them to roughly 100 mm by 100 mm and 200 mm by 100 mm, and cut them from scrap acrylic or plywood. Measure all four sides and both diagonals with calipers.
A genuinely square part will have equal opposing sides and equal diagonals. If the diagonals differ by more than a fraction of a millimeter, revisit the gantry squaring and belt tension before trusting the machine. Keep that test square in your shop as a quick reference; re-cutting it after a move, a belt change, or a hard bump takes two minutes and saves a ruined sheet.
Maintain Calibration Over Time
Calibration is not a one-time event. Bumps during transport, temperature swings in a garage workshop, and normal belt stretch all nudge a machine out of square. Build a habit of cutting your test square whenever you notice edges drifting, and re-check the beam path every few months or after any maintenance that opens the optics.
Keep a small log in a notebook: date, measured diagonals, belt condition, and any mirror tweaks. Over a year this record shows you exactly how your particular machine behaves and tells you which adjustment actually fixed a problem instead of guessing. A well-calibrated machine not only cuts cleaner but also wastes less material, which matters when you are producing inventory for a shop or filling custom orders.
Troubleshoot Residual Drift After Squaring
Sometimes a machine passes the test square yet still cuts slightly off on long parts. The usual culprit is a single loose bearing or a rail that is not parallel to the bed over its full travel. Slide the head slowly by hand from one end to the other and feel for tight spots or wobble; a gritty section means the rail needs cleaning and re-lubrication before you trust long cuts.
Another hidden cause is software scaling. If your design software and controller use different units or a wrong steps-per-mm value, every cut is consistently wrong by a percentage, which mimics a squareness problem. Cut a 100 mm line, measure it, and compare; if it comes out 101 mm, fix the axis calibration in the controller rather than re-squaring the hardware. Separating mechanical from electronic error saves hours of chasing the wrong adjustment.
Frequently Asked Questions
How often should I square my laser bed?
For a home workshop that is moved rarely, a full squareness check every three to six months is usually enough, plus a quick test cut whenever cuts start looking off. Busy production shops or machines that travel to markets should check monthly, since vibration and belt stretch accumulate faster under heavy use.
Can I square the bed without special tools?
Yes. A framing square and a steel ruler cover most needs, and the diagonal-measurement method uses only a tape measure. A digital caliper helps for the final test cut verification but is not required to get the gantry square in the first place.
Why do my corners not meet even after squaring?
If the gantry is square and corners still drift, check belt tension, pulley set screws, and beam alignment. An off-center nozzle or incorrect focus also produces angled kerfs that look like a squareness problem from the top but are really an optics issue.
Get your cuts honest again by exploring the Redsail flatbed and desktop machines at https://www.redsaillaser.com/Laser-Cutter.html, built to hold calibration job after job. For higher-volume production needs, HF Laser industrial cutters offer larger beds and automated loading.

- National hotline: +86-531-86516855/56/57
- Enterprise mailbox:sales@redsaillaser.com
- Address: Room 402E, Tower D, Yinhe Building, 2008 Xinluo Avenue, Shunhua Road Subdistrict, Jinan Area, China (Shandong) Pilot Free Trade Zone


Redsail Tech Co. © 2002-2026. All Rights Reserved.