
Why Acrylic Needs Special Care
Acrylic is a dream to cut on a CO2 laser: it edges cleanly, comes in every color, and looks like glass without the weight. The catch is that it scratches and clouds easily, and a single careless stack can turn a box of finished inventory into a pile of reject stock. Good laser cut acrylic care starts the moment the piece leaves the bed, not when a customer complains about a scuff. For makers selling acrylic crafts online, how you store and handle material is as important as how you cut it.
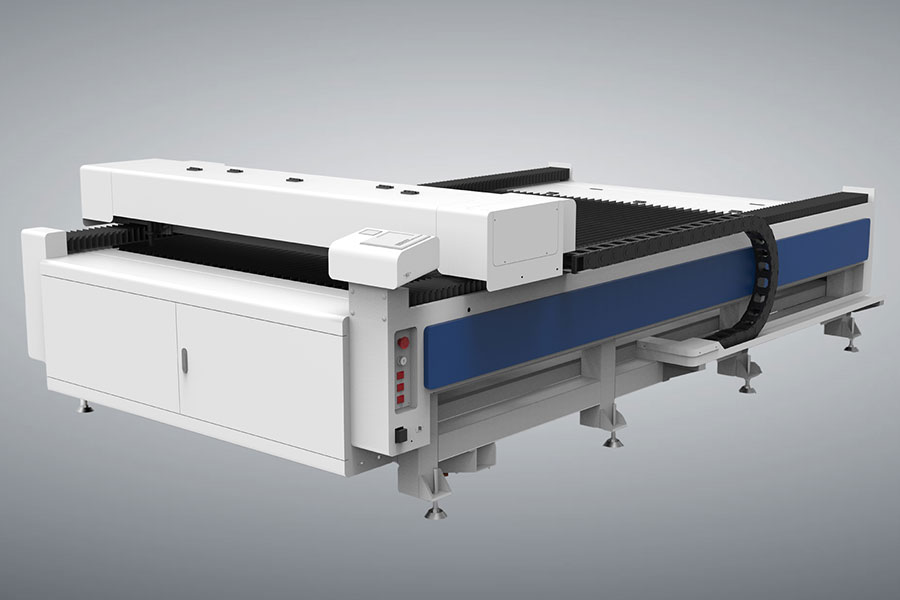
This article covers practical habits for storing sheets and finished parts, cleaning cloudy surfaces, and packing acrylic so it arrives gift-ready. Whether you cut on a M6090E or a CM1325 flatbed, the material behaves the same, so these routines apply across the whole Redsail range. Treat acrylic gently and it stays crystal clear for years; treat it like plywood and you will be re-cutting a lot of orders.
Store Raw Sheets Flat, Not Leaning
The first rule to store acrylic correctly is to keep full sheets flat and supported along their whole length. Leaning a sheet against a wall bows it, and a bowed sheet cuts unevenly because the focus distance changes across the bed. Lay sheets on a flat rack or between two straight boards, and keep them out of direct sun, which can warp thin stock and yellow clear acrylic over time.
Separate sheets with soft interleaving paper or a clean cotton sheet so they do not rub. Keep the factory protective film on until you are ready to cut; that film is the best scratch protection acrylic ever gets. If you must store cut offcuts, sort them by thickness in labeled bins so you are not digging through a pile and scratching good pieces to find a small scrap.
Handle Finished Parts With Clean Hands
After cutting, peel the film slowly rather than yanking it, because a fast pull can static-cling dust onto the fresh surface. Handle finished parts by the edges, not the face, and keep them away from keys, zippers, and rough tabletops. A dedicated pair of cotton gloves costs little and stops the oily fingerprints that show up badly on clear and mirrored acrylic.
For intricate acrylic laser projects like layered shadow boxes or stacked signs, store each layer in its own compartment so edges do not knock together. Small parts trays from a hardware store work well, and labeling the tray with the project name saves setup time on reorder. The goal is that a repeat customer's second order looks exactly as clean as their first.
Clean Without Scratching
When acrylic does get dusty or fingermarked, never use paper towels, tissues, or a dry cloth, all of which are abrasive. Use a soft microfiber cloth lightly dampened with water or a plastic-specific cleaner, and wipe in straight lines rather than circles. For stubborn residue from the engraving process, a little mild dish soap on the cloth lifts it without hazing the surface.
Avoid ammonia-based window cleaners on acrylic; they can craze and cloud the plastic over repeated use. If a piece has gone slightly cloudy from bad handling, a plastic polish applied with a foam pad can restore much of the clarity, though prevention is far easier than repair. Keep a small cleaning station by your packing area so every item gets a final wipe before it is boxed.
Static is the quiet enemy of clear acrylic, because it pulls dust right back onto a surface you just cleaned. A quick pass with an anti-static cloth or a dedicated acrylic polish that contains anti-static agents keeps pieces cleaner for longer between handling. In a busy workshop, wiping the storage bin interior occasionally matters as much as wiping the product, since a dusty bin re-contaminates everything you place inside it.
Protect Edges and Surfaces in Storage
Laser-cut edges are smooth but still scratch when rubbed against other acrylic. Store finished flat items face to face with a sheet of tissue or bubble wrap between them, and never stack more than a few deep so the bottom piece is not pressured. Upright display is fine for short periods but long-term leaning invites bowing, especially on thin tags and charms.
For painted or etched acrylic crafts, give the surface a day to fully cure before stacking, because fresh paint can transfer. If you seal edges with a flame-polish or a clear coat, let it off-gas completely before bagging, or you risk a foggy film forming inside the package. A little patience in storage prevents the heartbreaking "looked great yesterday, cloudy today" problem.
Pack for Shipping and Gifts
Shipping acrylic is where most damage happens, so pack like the box will be dropped, because it will be. Sandwich each piece between two rigid cards inside a bubble mailer, or use a corrugated box with void fill so nothing shifts. For clear items, a resealable poly bag keeps dust off during transit and makes the unboxing feel premium.
Consider these packing essentials:
- Rigid backing card to stop bending in transit.
- Bubble wrap or foam between stacked pieces.
- A clear poly bag for dust-free, gift-ready presentation.
- A "do not bend" label on envelopes with flat items.
- Tissue or kraft filler to stop parts rattling in the box.
A clean, well-packed acrylic item photographs better for listings and arrives review-ready, which protects your rating as much as the product itself.
Keep an Inventory That Stays Saleable
If you make acrylic crafts ahead of demand, rotate stock so the oldest pieces ship first, just like any perishable good. Store inventory in a closed bin away from workshop dust and laser smoke, because fine particulate settles on clear acrylic and dulls it invisibly until light hits it. A quick wipe at packing time restores the shine, but keeping the bin closed reduces how often you need to.
Label bins by color and thickness so you are not opening everything to fill an order, which exposes the rest to handling. With a little discipline, a shelf of laser-cut acrylic can sit for months and still ship looking brand new, turning your spare cutting time into a real, sellable inventory instead of a clutter problem.
Avoid the Common Storage Mistakes
A few habits quietly ruin acrylic, and most makers learn them the hard way. Never store clear sheets in a damp garage where condensation forms on the surface, because that moisture can fog the plastic and encourage mold in protective paper backing. Never leave film on indefinitely in heat, either, since some adhesives bond to the acrylic over time and peel the surface when removed.
Another frequent error is stacking finished parts face-down on a rough cutting mat, which transfers the mat's texture as micro-scratches. Always place acrylic on a smooth, clean surface or interleave with tissue. Finally, keep acrylic away from solvents like acetone and strong cleaners sitting open on the same shelf; their fumes can haze nearby clear stock even without direct contact, so give your inventory its own closed bin.
Frequently Asked Questions
Can I use glass cleaner on laser-cut acrylic?
Avoid ammonia-based glass cleaners, as they can cloud and craze acrylic over time. Use a plastic-specific cleaner or mild soapy water with a microfiber cloth, wiping in straight lines to prevent fine scratches.
How should I store offcuts so they stay usable?
Sort offcuts by thickness in covered bins, keep their protective film on when possible, and store flat rather than leaning. Labeling the bins by size and color makes it easy to grab a scrap without handling and scratching the good stock.
Why did my clear acrylic turn cloudy in storage?
Cloudiness usually comes from dust settling on the surface, off-gassing from fresh paint or sealant trapped in a bag, or abrasive cleaning. Store pieces clean, cured, and in closed dust-free bins, and clean only with soft microfiber and plastic-safe products.
Keep your acrylic inventory flawless with a Redsail laser built for clean, polished cuts at https://www.redsaillaser.com/Laser-Cutter.html. For larger production runs and industrial-scale acrylic work, HF Laser industrial cutters provide the power and bed size to match.

- National hotline: +86-531-86516855/56/57
- Enterprise mailbox:sales@redsaillaser.com
- Address: Room 402E, Tower D, Yinhe Building, 2008 Xinluo Avenue, Shunhua Road Subdistrict, Jinan Area, China (Shandong) Pilot Free Trade Zone


Redsail Tech Co. © 2002-2026. All Rights Reserved.