
Why Wood Is the Best First Material
Wood is forgiving, affordable, and rewarding on a desktop CO2 laser, which makes it the ideal place for a new maker to build confidence. The same sheet of plywood can teach you cutting, engraving, and finishing in a single weekend, and almost every project below uses scraps you already have.
This roundup gives twelve approachable wood laser projects arranged so each one teaches a slightly bigger skill. Work through them in order and you will move from your very first cut to a finished, gift-worthy item without buying anything fancy.
1. A Simple Name Tag
Start with a rectangular tag engraved with a name and a small icon. Use 3 to 4 mm poplar or birch plywood, engrave at 300 to 500 DPI with 20 to 35 percent power, and cut the outline at a slower, higher-power pass. This project teaches focus, placement, and the difference between raster and vector jobs.
2. Coasters from Offcuts
Cut 90 mm circles from scrap and engrave a map, a monogram, or a pattern. Coasters are perfect for practicing even engraving across a larger area, and a set of four makes a ready gift. Seal with a clear matte spray so rings do not stain the wood.
3. A Key Chain Blank
A small rectangular key chain with a hole and an engraved initial is quick and satisfying. It introduces drilling or laser-cutting a small hole and shows how thin plywood behaves at the edges. Make a handful in one sheet and keep them as test pieces.
4. A Phone Stand
A flat-pack phone stand cut from 4 to 6 mm plywood teaches living hinges and slot joints. Engrave a logo on the back, then fold the score lines. This is your first taste of functional, assembled woodworking rather than a flat tile.
5. Recipe or Book Stand
Step up to a slightly larger stand with a ledge and a back prop. This project reinforces accurate slot sizing, because a loose joint looks sloppy while a tight one cracks the wood. Test the fit on scrap before cutting the good sheet.
6. A Wall Hook Shelf
Cut a small shelf with two keyhole slots and engrave a label for what goes on it. Mounting it teaches you that finished weight matters, so choose 6 mm ply for anything meant to hold objects rather than just decor.
7. A Puzzle for a Child
A three to six piece puzzle cut from 4 mm wood is a gentle introduction to tight tolerances. Keep piece count low at first; complex interlocking shapes need careful kerf compensation so they fit but do not fall apart.
8. A Desk Tray Organizer
A flat-pack tray with compartments teaches nesting many parts in one sheet and assembling a box without glue. Engrave section labels so the organizer is both useful and personal, and sand the cut edges lightly for a smooth feel.
9. A Photo Engraving Plaque
Practice photo engraving by converting an image to a dithered bitmap and burning it into a hardwood offcut at 300 to 600 DPI. This is where you learn that hardwoods like maple engrave cleaner than soft pine, which tends to scorch.
10. A Seasonal Ornament Set
Cut a dozen themed ornaments from 3 mm ply and engrave dates or names. Batch production teaches you to nest efficiently and keep a consistent finish across many pieces, a skill that pays off if you ever sell.
11. A Recipe Box or Card Caddy
A small box with a lid introduces lid alignment and optional living hinges. Measure twice in software and once on the bed; a misaligned lid is the most common beginner box mistake and an easy one to avoid.
12. A Finished Gift Bundle
Combine a coaster, a key chain, and an ornament into a small gift set tied with twine. Packaging your earlier projects together is the final lesson: presentation turns loose laser crafts into something that feels store-bought.
Materials and Settings Starter
Most of these wood laser projects use 3 to 6 mm plywood or solid wood. As a baseline, engrave at 300 to 500 DPI with 20 to 40 percent power, and cut 3 mm ply at roughly 15 to 25 percent power with moderate speed, adjusting for your tube. Keep a notebook of what worked on each wood type.
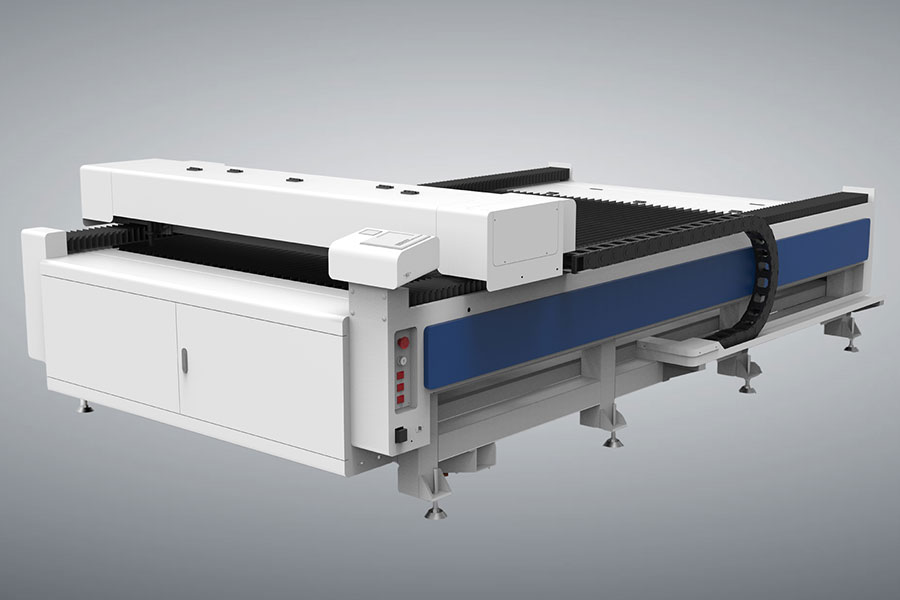
For the machine itself, our Redsail CO2 laser cutters cover bed sizes from compact desktops to larger formats, so you can start small and scale up as your projects grow. The principles above stay the same regardless of bed size.
Setting Up Your Machine for Wood
Before any of the twelve projects, spend ten minutes on setup so every cut lands true. Clean the lens and mirrors with a cotton swab and alcohol, because a dusty lens scatters power and leaves weak, uneven cuts. Confirm the focal distance with the gauge that came with your machine, since wood sits at a different height than acrylic or metal.
Place your sheet flat on the honeycomb and tape the corners so it cannot lift into the beam. Run a small test square at your intended settings on a scrap corner, then check that the cut goes all the way through and the engrave looks the tone you expected. This five-second habit saves whole sheets of plywood over time.
Light air assist makes a real difference on wood, blowing away flare-ups that would otherwise brown the edge. Keep it on for cutting and modest for engraving, and empty the compressor trap so moisture never reaches the lens.
Tools and Consumables to Keep Handy
A small kit beside the machine saves constant trips. Keep extra plywood offcuts in common thicknesses, a roll of heat-resistant tape, a soft brush for the bed, and a set of small files for cleaning edges. A caliper helps you measure material thickness so your focus stays accurate, and a notebook records the settings that worked for each wood.
Add a few tins of finish, some sandpaper in 220 and 320 grit, and a wood glue for the assembled projects. With these on hand, a free afternoon turns into several finished pieces instead of a supply run.
Finishing and Safety for Wood Projects
Most wood laser projects look better after a little finishing. Lightly sand cut edges with 320 grit to remove whiskers, then apply a clear matte or satin sealant to protect against stains and bring out the engraving contrast. For food-adjacent items like coasters, use a food-safe oil and let it cure fully.
Ventilation matters with wood because smoke carries fine particulate that settles inside the machine. Vent outdoors or through a filtered system, and wipe the rails occasionally so residue does not harden into the bearings. A clean machine cuts straighter and lasts longer.
Never leave a running laser unattended, especially on thin offcuts that can flare. Keep a fire extinguisher or bowl of water within reach, and end each session by brushing the bed clear of embers. Safe habits are what let you enjoy woodworking for years.
From Practice to Selling Your Work
Once you have run through several of these wood laser projects, you have a natural product line for markets or online listings. Coasters, key chains, and ornaments are small, ship cheaply, and personalize well, which is exactly what buyers look for in handmade goods.
Photograph pieces on a simple neutral background and note the wood type and size in each listing. Personalization, such as a name or date, justifies a higher price than a generic item and turns one design into endless variants from the same file.
Frequently Asked Questions
Q: What wood is easiest for a beginner laser?
Plywood like birch or poplar in 3 to 4 mm thickness cuts cleanly and is cheap to practice on. Avoid oily tropical hardwoods at first, because they can scorch and produce more residue.
Q: Do I need to finish every wood project?
Not always, but a clear sealant protects against stains and brings out engraving contrast. Use a matte spray for coasters and trays that see handling, and leave decorative wall pieces raw if you prefer a natural look.
Q: How do I keep cut edges from browning?
Use the lowest power that still cuts through, and rely on speed to do the work. A small air assist and a clean lens also reduce edge discoloration on wood.
##
Twelve projects is enough to take you from unboxing jitters to a shelf of finished gifts, and each one builds a skill you will reuse forever. Pick the first tag, cut it today, and let momentum carry you through the list. For higher-volume production cutting, also check our sister brand's industrial laser cutter range.

- National hotline: +86-531-86516855/56/57
- Enterprise mailbox:sales@redsaillaser.com
- Address: Room 402E, Tower D, Yinhe Building, 2008 Xinluo Avenue, Shunhua Road Subdistrict, Jinan Area, China (Shandong) Pilot Free Trade Zone


Redsail Tech Co. © 2002-2026. All Rights Reserved.