
Why Straight Cuts Matter for Every Project
A desktop CO2 laser is only as good as the squareness of its beam path. When your machine is out of alignment, even simple rectangles come out as parallelograms, and interlocking joints refuse to fit together the way your design promises. For makers selling on Etsy, building prototypes at home, or running a small sign business, a few degrees of drift can turn a clean drawing into a pile of scrap material and a wasted afternoon.
Taking the time to calibrate your laser cutter pays off in less wasted stock and far less post-processing sanding. Straight, repeatable edges mean parts slot together the first time, engravings sit exactly where you intended them, and your finished pieces look professionally manufactured rather than homemade. This walkthrough covers the complete straight cut tuning routine you can repeat every few months to keep results crisp, square, and dependable for every project you tackle.
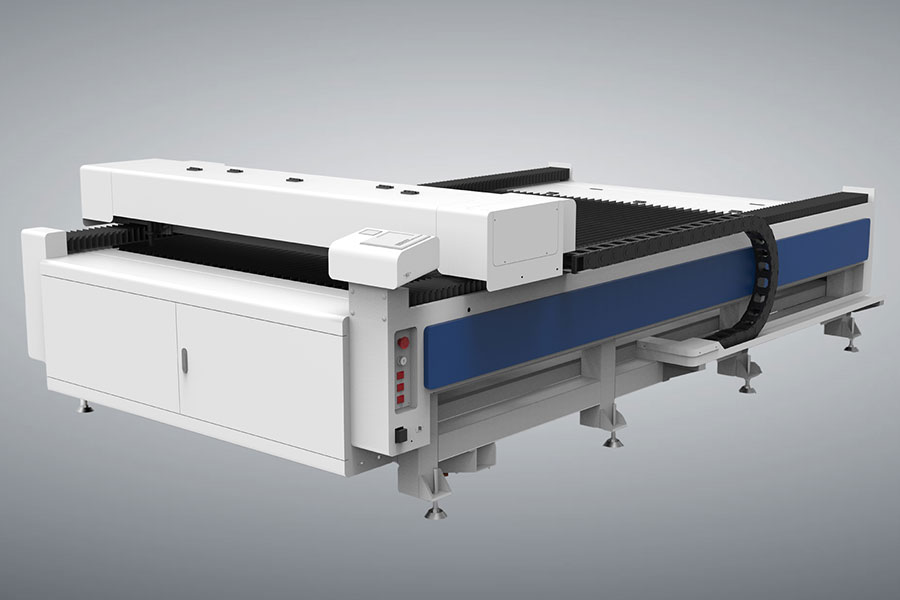
Start With Mirror Alignment
The most common cause of wandering cuts is misaligned mirrors. A CO2 laser bounces its beam through two or three mirrors before reaching the focusing lens, and each one must aim the beam dead-center on the next. If a mirror sits even slightly off, the effective cut angle changes depending on where the head is positioned on the bed, so a shape cut in the corner will not match one cut in the center of the work area.
Begin by firing a low-power test pulse, roughly 10 to 15 percent power with no movement, onto a scrap piece covered in masking tape near each mirror. You should see a tiny, centered burn dot. Move the head to the far corner and pulse again, then turn the mirror screws until both dots land on the same spot. Always work from the tube outward and re-check earlier mirrors, because moving one shifts the whole chain.
Take your time, because a properly aligned beam produces identical burn marks at every position, and that consistency is the foundation of square laser cuts. Rushing mirror work is the number-one reason people redo the process a week later, so budget a relaxed half hour and verify each mirror twice.
Check Belt Tension and Pulley Set Screws
Loose belts are the silent enemy of cutting accuracy. When a belt is too slack, the gantry lags behind the motor command, so cuts curve or shift at direction changes and corners look rounded rather than crisp. Too tight, and you strain the stepper motors and wear the idler bearings prematurely, which creates its own noise, heat, and slow drift that is hard to diagnose later.
Press gently on the X and Y belts; they should have a slight give but snap back without flopping around. Tighten the tensioners a quarter turn at a time and re-test, because over-tensioning is just as harmful as slack. While you are in there, confirm the set screws on the pulley hubs are tight against the flat of each motor shaft — a slipping pulley produces random offsets that mimic alignment problems but are not fixed by mirror work at all.
Also inspect the belt for fraying, cracks, or missing teeth, because a damaged belt will never hold calibration. Replace it before investing more effort, and keep a spare on hand since belts are cheap insurance against a stalled weekend project.
Level the Bed for Even Focus
An uneven bed changes your focal distance across the work area, showing up as cuts clean on one side and weak on the other. Bed leveling keeps material at a consistent height so the laser stays in focus everywhere you cut, critical for uniform edge quality on larger sheets and batch jobs.
Place a flat reference board on the honeycomb or knife bed and use a height gauge or a stack of feeler shims to measure clearance at the four corners and the center. Most beds adjust with screw feet or shim spacers underneath the panel; bring every measured point within about half a millimeter of the same height for best results. If your piece rocks even slightly on the bed, the focus will vary and edges will look inconsistent from one region to the next.
If your machine has a motorized Z table, raise it to mid-height and confirm the bed sits parallel to the gantry rail with a small digital level. Tiny differences compound across a 300 millimeter span, so this step is worth doing carefully. A parallel bed also protects your lens from accidental crashes during focusing moves.
Run the Squareness Test
The definitive check is a cut square. Draw a 100 millimeter by 100 millimeter square in your design software and cut it at modest settings, say 40 to 60 percent power at 300 to 500 millimeters per second depending on your material, into a stable scrap sheet. Then measure both diagonals with calipers and compare them to see whether the shape is geometrically true.
- If the diagonals match within about 0.3 millimeter, your machine is square and you can move on.
- If one diagonal is clearly longer, the Y axis is not perpendicular to the X axis.
- Find the adjustment bolts where the rail mounts to the frame and skew the rail slightly until the square reads true.
Repeat the cut and measure again, because this loop is the heart of straight cut tuning. You are using hard numbers to confirm the fix worked before trusting the machine on real stock. Keep your test squares as a quick-reference collection for future monthly checks.
Set Steps per Millimeter in Firmware
Even with perfect mechanics, the controller must know exactly how far the head travels per motor step. If steps per millimeter are wrong, a 100 millimeter command produces 98 millimeters of real movement, and every project runs slightly small, which is a quiet disaster for interlocking boxes or layered signs where tight tolerances matter most.
Measure a long travel to find the error: command the head to move 200 millimeters and physically measure how far it actually went with a ruler or calipers. Then apply the formula new steps equals old steps multiplied by commanded distance divided by actual distance, entering the result in your firmware configuration. Save the value to EEPROM or your settings file so it persists across power cycles and does not reset the next time you switch the machine off.
Re-cut your test square after the change and confirm the dimensions match your design to within a fraction of a millimeter. Combined with alignment, belt tension, and bed leveling, correct steps per millimeter gives you cuts that match your drawing precisely — exactly what you need for stacked or press-fit work and for satisfying repeat customers who expect consistent sizing.
Maintain Alignment and Troubleshoot Drift
Calibration is not a one-time event. Vibration from cutting, seasonal temperature swings that shift frame geometry, and normal belt stretch all pull a machine slowly out of square, so building a light maintenance habit keeps your laser alignment stable between deep tunings and prevents surprise failures in the middle of a paid order.
Adopt a simple routine: eyeball belt tension weekly, run the squareness test monthly, and do a full mirror and bed check every three or four months. Note your measurements so you can spot slow drift before it becomes visible. If you move the machine, treat it as knocked out of alignment and verify before the next job.
If you see good cuts in the center but drift at the edges, skip the mirrors and check for racking instead — a gantry twisting because one side's belt is tighter than the other. Place identical reference marks on both ends of the gantry, move it, and if one end leads, equalize belt tension side to side. Solving racking eliminates the classic parallelogram-at-the-edges defect that frustrates newcomers and costs real material.
Frequently Asked Questions
How often should I calibrate my laser cutter?
For a home hobby machine used a few hours a week, a full alignment check every three to four months is plenty. If you move the machine, ship it, or notice drift in joints, run the squareness test immediately. Belt tension and bed level are worth a quick look monthly, especially in workshops that see big day-to-night temperature changes affecting the frame.
Why do my cuts curve at the corners?
Curved corners usually mean belt slack, a slipping pulley, or acceleration set too high for the mechanical load. Tighten and re-test first, then lower the acceleration setting in firmware slightly if the curve remains. Mirror misalignment tends to cause angled rather than curved errors, so the shape of the defect tells you exactly where to start looking for the root cause.
Can I square the bed without special tools?
Yes. A printed 100 millimeter square, a ruler, and a pair of calipers cover most of the routine. A digital level helps with bed parallelism but is not required for basic laser alignment work. The squareness test above needs nothing more than scrap material and a measuring tool you likely already own, so there is no real excuse to keep putting it off.
Get Started
Set aside an hour this weekend and run the squareness test on your machine — you will likely find a small adjustment that makes every future project cleaner and tighter. If you are shopping for a reliable desktop platform to tune up and grow with, browse the Red Sail Laser cutters built for makers and small shops.
For industrial-scale production machines, see the HF Laser cutting machines.

- National hotline: +86-531-86516855/56/57
- Enterprise mailbox:sales@redsaillaser.com
- Address: Room 402E, Tower D, Yinhe Building, 2008 Xinluo Avenue, Shunhua Road Subdistrict, Jinan Area, China (Shandong) Pilot Free Trade Zone


Redsail Tech Co. © 2002-2026. All Rights Reserved.