
Why Laser-Cut Paper Invitations Are Worth It
Paper is one of the most forgiving materials you can run through a CO2 laser, and it rewards careful setup with results that look far more expensive than they cost. A desktop or benchtop machine turns plain cardstock into lace-like wedding suites, layered shadow invitations, and intricate place cards in a single pass. If you already own a CO2 laser cutter or are shopping for one, paper work is the perfect low-risk way to learn your machine's behavior before moving to pricier media.
The appeal is speed and repeatability. Once you dial in a setting for a 216 gsm cardstock, you can cut fifty identical invitations in the time it would take to hand-cut five. There is also very little waste, since nesting layouts let you pack shapes tightly on a single sheet. For home-based makers and personalization sellers, that combination of elegance and efficiency is hard to beat.
Choosing the Right Paper and Cardstock
Not all paper behaves the same under a beam, and the differences become obvious on your first test cut. Lightweight printer paper in the 80–100 gsm range cuts almost instantly but curls and scorches easily, so reserve it for liners and inserts rather than the hero piece of the suite. Mid-weight cardstock between 160 and 270 gsm is the sweet spot for invitations: it holds a crisp edge, stays flat on the bed, and still cuts cleanly on a 40–60 W tube without multiple slow passes. Heavy board above 300 gsm needs slower speeds or repeated passes and can brown at the edges, so treat it as an advanced material.
Color and finish matter just as much as weight. White and pastel stocks show scorch marks far more than darker tones, which means you may want to engrave from the back or use a lower power to keep edges clean. Coated and glossy papers can off-gas unpleasant fumes and often do not cut as cleanly because the coating resists absorption, so matte or uncoated stocks are the safer choice for beginners. Always keep a small offcut of each new batch to test before committing to a full run, because two "white" cardstocks from different brands can react very differently.
A quick checklist for stock selection before you buy in bulk:
- Weigh it: 160–270 gsm for main pieces, 80–100 gsm for liners and inserts.
- Feel the coating: prefer matte, uncoated, or lightly textured finishes over gloss.
- Check the color: darker shades hide scorch better than bright white.
- Test a swatch: cut a corner and read the edge before loading the full sheet.
Dialing In Speed, Power, and DPI Settings
Settings vary by tube wattage, but you can start from a reliable baseline and adjust from there. For 200 gsm cardstock on a 40–60 W CO2 laser, try 100–150 mm/s at 12–18% power for cutting with a single pass. Thinner 120 gsm paper often cuts well at 200–300 mm/s and 8–12% power. If edges look fluffy or uncut, drop speed by 20% or raise power by 2–3 points rather than making large jumps that risk burning the sheet. Keep a notebook of every successful setting tied to the exact stock and brand.
Engraving detail such as a monogram or fine filigree is best done as a raster at 300–500 DPI. Higher DPI adds little visible detail on paper and slows the job considerably, so 400 DPI is a sensible default for most work. Keep power low, around 10–15%, for engraving so you mark the surface without burning through. A lower DPI of 250 can actually look cleaner on textured stock because it deposits less heat per dot and reduces the risk of browning across a large fill area.
Troubleshooting the faults you will meet most often:
- Brown edges: reduce power 2–3% or raise speed slightly and improve airflow.
- Torn corners: slow down 15% and secure the sheet with light tape at the edges.
- Uneven cuts: check the lens is clean and the bed is flat, then re-level if needed.
- Smoke marks: add a small fan or pause to clear haze between dense passes.
Layout, Nesting, and Weeding Workflow
Good results start in the design software long before the beam moves. Build your invitation as a vector file with cut lines on one layer and engrave details on another, then assign different colors to each operation so the controller knows what to do. Nesting, which means packing shapes close together with a few millimeters of gap, lets you cut more pieces per sheet and saves material. Leave thin bridges or tabs on delicate lace so the cut piece stays attached until you deliberately pop it free, which prevents torn filigree during removal.
Weeding paper is gentler than vinyl but still needs a steady hand. Use a soft pick or fine tweezers to lift away the negative space, working from the center outward so you do not tear thin connectors near the edge. For layered invitations, cut the backing first, then the top layer, and align the two by eye or with small registration marks you later trim away. A light spray adhesive or double-sided tape binds layers without adding bulk, and it keeps the suite feeling like one cohesive object rather than loose parts.
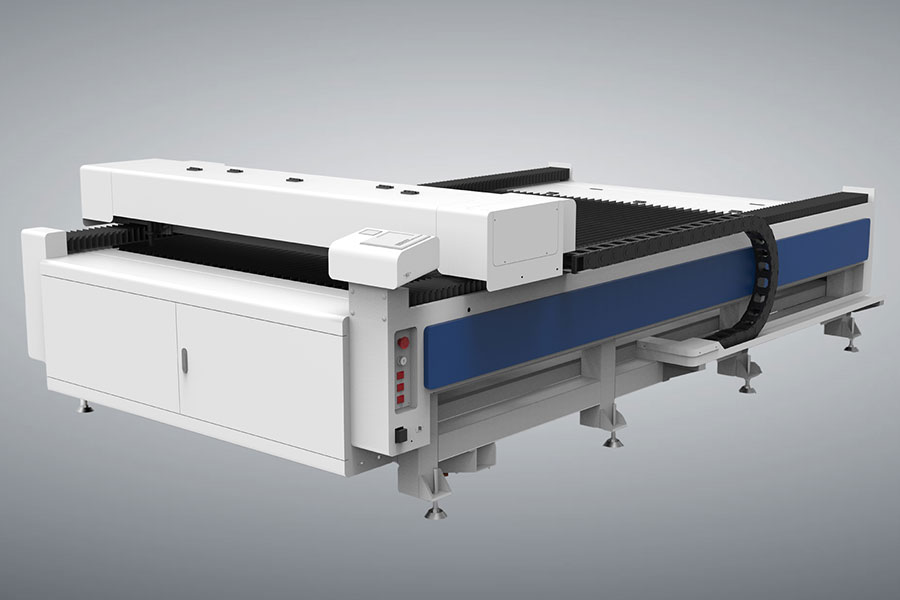
When you are ready to scale up, a flatbed CO2 laser cutter with a larger working area lets you process full A3 sheets and batch dozens of invites at once. That throughput is a real advantage once orders start arriving, because a single wedding suite can mean two hundred or more individual cut pieces when you include RSVP cards, envelope liners, and place cards.
Adding Layers, Liners, and Personal Touches
Single-layer cuts look great, but layered invitations read as genuinely premium. Cut a solid backing in a contrast color, then a filigree top layer, and sandwich a vellum or translucent insert between them for depth that catches the light. Because the laser is so precise, you can repeat a motif such as a fern, a crest, or a geometric frame across the whole suite so the invitation, RSVP, and envelope liner feel like a designed set rather than separate crafts.
Personalization is where a maker business adds real value. Engrave each guest's name or a table number directly onto the card, or cut a custom monogram in the center as the focal point. For events, matching place cards and favor tags produced from the same file keep everything cohesive and reduce setup time. Keep fonts simple and at least 4 mm tall for cutting, because thinner strokes tend to burn away or snap during weeding and leave you with a broken letter.
Consider small production touches that buyers notice. A consistent corner radius, a matching liner pattern, and a thin engraved border all signal quality. If you sell direct, include one fully assembled sample photo in your listing so customers understand the layered construction, since flat scans hide the depth that makes laser-cut paper special.
Finishing, Packaging, and Care
Once cut, let pieces rest flat under a light weight for an hour to relax any curl introduced by heat. If edges show slight browning, a very light sanding with fine grit or a white gel pen along the cut edge can tidy them, though for most pastel stocks leaving the natural tone is part of the charm. Store finished invitations in a flat box away from humidity, because paper absorbs moisture and can wave or warp if left in a damp room or a hot car.
Packaging matters as much as the product when you sell. Use clear cello sleeves or a rigid mailer so the lace detail is protected in transit, and include a handwritten note if you ship direct to customers. Buyers love seeing the maker's hand, so a small tag that reads "made on a CO2 laser" reinforces the craft story without overwhelming the design. Keep samples of each stock you use so future reorders match exactly, since dye lots shift between paper batches.
FAQ
Can I cut glossy or photo paper with a CO2 laser?
Glossy and photo papers carry coatings that can release fumes and resist a clean cut, so they are best avoided for the main piece. Matte, uncoated cardstock gives you cleaner edges and fewer scorch marks, and it is safer for home use where ventilation may be limited.
What power laser do I need for paper invitations?
A 40 W tube handles most cardstock up to about 270 gsm with a single pass. If you plan to cut heavy board or batch large runs, a 60–80 W machine gives more headroom and faster speeds, but it is not required to start a paper-focused maker business.
How do I stop paper from scorching at the edges?
Lower the power by a couple of percent and raise the speed slightly, engrave fine detail from the back of the sheet, or choose a darker stock that hides browning. Keeping the lens clean and the airflow steady also reduces the heat buildup that causes edge scorch.
Start Crafting Your Own Invitation Suite
Paper is the friendliest place to begin your laser journey, and the payoff is immediate: beautiful, repeatable invitations you can keep, gift, or sell. Start with one tested cardstock, lock in your settings, and build a small suite before taking custom orders. If you later outgrow a desktop bed, HF Laser builds larger flatbed and auto-feeding CO2 machines that scale with your business.

- National hotline: +86-531-86516855/56/57
- Enterprise mailbox:sales@redsaillaser.com
- Address: Room 402E, Tower D, Yinhe Building, 2008 Xinluo Avenue, Shunhua Road Subdistrict, Jinan Area, China (Shandong) Pilot Free Trade Zone


Redsail Tech Co. © 2002-2026. All Rights Reserved.