
Intro
Flat engraving gets you started, but the moment customers ask for personalized drinkware you need a rotary attachment. A rotary lets your CO2 laser spin a tumbler, bottle, or mug so the beam traces a straight line while the object rotates beneath it. This turns a cylindrical surface into a clean, repeatable canvas and unlocks one of the highest-margin product lines in the craft market.
This guide covers the setup, the settings, and the artwork tricks that make rotary laser work reliable instead of frustrating. As always, the numbers below are general starting points to confirm on a scrap or a cheap blank before you run a paid order, because coatings and diameters vary between suppliers.
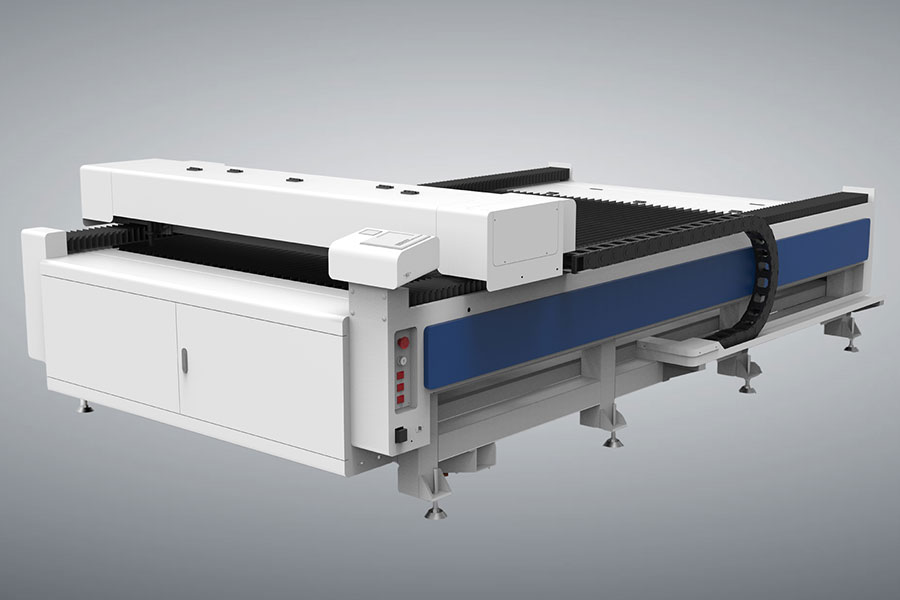
Why a Rotary Attachment Changes the Game
A standard flat bed focuses the beam at one height, which only works on a level surface. Cylinders curve away from that focal point the instant you move sideways, so without a rotary the engraving blurs or fails entirely. The rotary cradle spins the item so every part of the artwork passes through the exact focal plane, giving a consistently sharp mark from top to bottom of the design.
Rotary work is also where personalization businesses earn loyal repeat customers. Weddings, reunions, sports teams, and corporate gifts all want drinkware with names and dates, and those buyers reorder. Once your rotary workflow is dialed in, a dozen tumblers becomes a routine batch rather than a stressful one-off, which is exactly the kind of work that builds steady income.
Most rotaries are roller-style, where the item sits on spinning wheels, or chuck-style, where it is gripped at one or both ends. Roller rotaries handle a wide range of diameters and are beginner friendly, while chuck rotaries center small or oddly shaped items more precisely. Either type mounts in place of or alongside the bed and connects to the laser controller.
Setting Up the Rotary Correctly
Start by installing the rotary and telling your software that rotary mode is on, because this changes how the machine calculates movement. You will usually enter the roller diameter or the object diameter so the controller knows how far to rotate per unit of "Y" travel. Get this wrong and the artwork stretches or compresses around the curve, so double-check the value against the physical measurement.
Level the item so it sits true in the cradle, then focus the laser to the surface exactly as you would on a flat piece. Because the surface is round, focus to the highest point that the beam will strike. A gentle test scratch at low power confirms the focus before you commit to the full design, and it is far cheaper than scrapping a powder-coated tumbler.
Secure the item so it cannot slip during the spin. Rollers should grip firmly, and the item should rotate with the drive rather than skidding. If you see the artwork drift sideways between passes, the item is slipping, and you need more contact or a small rubber band to add grip. A stable spin is the difference between a crisp logo and a smeared mess.
Dialing In Speed and Power
Powder-coated tumblers engrave by removing the coating to reveal the metal beneath, so the goal is a clean mark without cutting into the steel. A common starting point is around 25 to 40 percent power at 200 to 400 mm per second with a 300 to 500 DPI scan, then adjust in small steps. Too much power burns the coating brown; too little leaves a faint, incomplete mark.
Stainless bottles and bare metal mugs need more care because there is no coating to remove. Many makers apply a marking compound or use a slightly higher power to etch a frosted line, and testing on a hidden area is essential. Glass bottles engrave to a frosted look at lower power, closer to 15 to 25 percent, and they benefit from the same wet-towel trick used on flat glass to avoid chipping.
Keep air assist modest on drinkware so you do not blow debris that scratches the surface, but enough to clear residue. After the run, wipe the piece and check for bare spots under good light. A quick second pass at low power can fill in a faint area, but it is better to get the first pass right through careful testing on a spare blank of the same type.
Wrapping Artwork Around the Curve
The trickiest part of mug engraving is making artwork that looks right once it wraps. In your design software, think of the curved surface as a flattened rectangle whose width equals the object circumference, which is pi times the diameter. A 75 mm tumbler has a circumference near 235 mm, so size text and logos to fit that span without crowding the seam where the design meets itself.
Center the artwork and leave a small margin on each side so the start and end do not collide at the back. For full-wrap designs, plan the seam deliberately, such as placing it at the back of the tumbler where a hand naturally covers it. Curved text that follows the contour reads better than straight text forced onto a round surface, and most rotary software supports mapping text to the curve.
Watch for distortion on very small diameters. The tighter the curve, the more the beam angle changes across a wide design, so keep large logos on bigger items and reserve fine detail for gently curved surfaces. Building a few template files for your most common tumbler sizes saves enormous time and removes guesswork from every new order.
Common Rotary Problems and How to Fix Them
The most frequent rotary complaint is artwork that looks fine on screen but comes out distorted on the item, and almost always the cause is an incorrect circumference or diameter entry in the software. Re-measure the actual object, correct the value, and run a quick test line before the full design to confirm the scale is right rather than discovering it on a paid blank.
Slipping is the second common issue, where the tumbler rotates unevenly and the engraving drifts sideways. This usually means the rollers are not gripping, the item is too light, or the drive wheel needs more contact. Adding a small rubber band at the contact point or tightening the cradle often solves it. If the mark is uneven around the curve, re-check focus, because a round surface drifts out of focus faster than a flat one if the item is not seated true.
Frequently Asked Questions
Do I need a special laser to engrave tumblers?
No, you need a standard CO2 laser plus a rotary attachment. The rotary does the mechanical work of spinning the item so the beam stays focused, and most desktop CO2 machines support one with a simple setting change in the control software.
Why does my engraving look stretched on a bottle?
Stretching means the rotary circumference setting does not match the actual diameter. Measure the object, enter the correct value in rotary mode, and re-test; even a few millimeters of error will visibly distort the artwork around the curve.
Can I engrave both sides of a tumbler in one job?
You can, but you must reposition and re-focus for the second side, and you should plan the artwork so the two halves align at the seam. Many makers run front and back as separate jobs to keep each pass perfectly focused and avoid overlap mistakes.
A rotary attachment is one of the best investments for a personalization business because drinkware orders keep coming back for every occasion you can name. Take the time to build a test routine and a few reusable templates, and the work becomes fast and profitable. If you are shopping for the right machine to pair with a rotary, the team at HF Laser covers compatible options at laser cutters from HF Laser.

- National hotline: +86-531-86516855/56/57
- Enterprise mailbox:sales@redsaillaser.com
- Address: Room 402E, Tower D, Yinhe Building, 2008 Xinluo Avenue, Shunhua Road Subdistrict, Jinan Area, China (Shandong) Pilot Free Trade Zone


Redsail Tech Co. © 2002-2026. All Rights Reserved.