
Intro
Paper and cardstock are two of the easiest, most rewarding materials you can run through a CO2 laser cutter, and they are the natural starting point for anyone moving from handmade crafts into a small invitation business. Whether you are making wedding suites, birthday cards, or custom stationery for an Etsy shop, a laser lets you cut intricate lace patterns and precise folds that are almost impossible to achieve with a craft knife or a die-cut machine.
The appeal is speed and repeatability: set up the design once, and you can produce dozens of identical pieces in a single afternoon. In this guide we cover the paper weights that work best, the settings that keep edges clean instead of scorched, and the workflow habits that save you from wasting expensive cardstock.
Choosing the Right Paper and Cardstock Weight
Not every paper behaves the same under a laser, and weight is the first thing to understand. Paper weight is usually given in grams per square meter (gsm) or pounds (lb); for reference, standard printer paper is about 80 to 90 gsm (20 to 24 lb), while invitation cardstock typically runs 200 to 300 gsm (65 to 110 lb). Lighter papers cut almost instantly but can curl from heat, while heavier cardstock holds its shape and gives that premium, rigid feel customers expect.
For most DIY invitations, a 216 to 270 gsm (80 to 100 lb) cover stock is the sweet spot. It is thick enough to feel substantial, thin enough to pass through a home printer for the text if you print before you cut, and stable enough that it does not warp during engraving. Avoid coated or glossy photo papers, because the coating can release unpleasant fumes and leave uneven edges.
If you want an extra-luxe look, consider cotton or rag-content paper, which engraves with a soft, tactile debossed finish. Just test a small swatch first, because natural-fiber papers can behave differently from wood-pulp stocks and may need slightly different timing to avoid browning around the cut.
Starting Settings for Clean Cuts
Laser settings are always starting points, not guarantees, and you should run a test grid on scrap before committing to a full sheet. For a 60 to 100 W CO2 laser, a good general guideline for cutting 216 to 270 gsm cardstock is to begin around 30 to 50 percent power at a speed of 300 to 600 mm/s, while thinner 90 gsm paper may need only 10 to 20 percent power at 500 to 900 mm/s to avoid burning through.
The goal is a clean "kiss-through" cut where the beam separates the paper without charring the surrounding area. If you see brown scorch marks, drop the power or raise the speed; if the piece does not fully release, nudge the power up slightly or slow the speed. Running two lighter passes can also help on thicker cardstock, because a single high-power pass dumps more heat into the sheet at once.
Always keep the material flat and well-supported on the honeycomb bed. A warped corner that lifts toward the lens will defocus the beam locally and leave ragged edges. Small neodymium magnets or low-tack painter's tape at the corners, away from the beam path, keep sheets from drifting as the airflow from cutting nudges them.
Design Tips for Intricate Lace and Folds
Invitation designs live or die on detail, and a laser rewards designs built with vector paths rather than raster images. Draw your cut lines as hairline strokes, about 0.001 inch or 0.025 mm, set to the cutter's "cut" color, and reserve any engraved text or patterns for a separate fill layer. This separation makes it trivial to adjust cut speed independently from engrave depth.
When you design lace or filigree, keep the smallest bridges and connectors at least 1.5 to 2 mm wide. Thinner detail looks delicate on screen but becomes fragile once cut, and pieces will break during handling or shipping. Tabbing the design to a surrounding frame, leaving thin links that you snip by hand after cutting, keeps delicate parts from flying off the bed or getting lost.
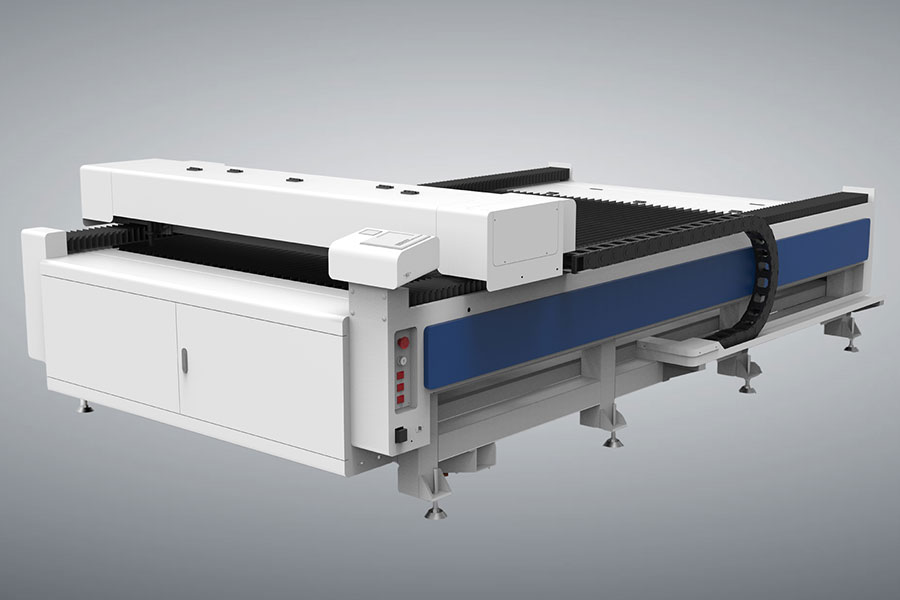
Plan your fold lines as a light scoring pass rather than a full cut. A reduced-power pass, often 8 to 15 percent at moderate speed, creases the cardstock so it folds cleanly without cracking the surface, which is especially useful for pocket folds and envelope liners. For a deeper dive into machine choice, you can also review the REDSAIL laser cutter lineup when planning a production setup.
Avoiding Scorch Marks and Heat Buildup
Scorching is the most common complaint with paper laser cutting, and it is usually a heat problem rather than a power problem. The simplest fix is to cut with the printed or "good" side facing down, so any minor edge discoloration ends up on the back. Many makers also place a sheet of clean scrap paper directly under the workpiece to absorb stray back-reflection.
Air assist matters more than people expect on paper. A steady stream of compressed air blows away hot ash and cools the cut line as it forms, dramatically reducing browning. If your machine supports it, increase air assist for paper and fabric jobs compared with wood. You can also reduce dwell time by nesting pieces tightly and cutting in a continuous path rather than jumping around the sheet.
Ventilation is non-negotiable. Paper produces a lot of fine smoke that will coat your lens and rails if it is not extracted, so confirm your exhaust fan is running and filters are clear before a big production run. A clean lens is the difference between sharp cuts and gradually degrading edges across a 50-piece order.
Post-Processing and Assembly
Once cut, most laser invitations need only light cleanup. A soft brush removes loose fiber dust, and a very light pass with a lint roller takes care of anything stuck to the engraved areas. If you printed text before cutting, check that the cut frame has not shifted relative to the print, because small misregistration is the usual sign that the sheet moved during the job.
For layered designs, assemble with a thin archival-quality glue or double-sided tape rather than wet adhesive, which can warp thin paper. Build a simple jig from scrap cardstock so each piece lines up identically, which keeps a multi-layer wedding suite consistent across a large order.
Finally, protect finished pieces. Stack them between sheets of tissue in a rigid box, because the fine lace edges dent easily. If you ship, use a flat mailer with a piece of backing board so the intricate corners arrive as crisp as they left your bench.
Scaling Up to Small Batch Orders
Once you are comfortable with single sheets, the leap to paid orders is mostly about consistency and time management. Build a small library of reusable design templates, name cards, monogram frames, and lace borders, so each new client is a quick customization rather than a blank page. Template reuse is what turns a fun craft into a dependable side income.
Batch your work by stage rather than by order. Cut all the pieces for a run first, then do any engraving, then assemble, then pack. Switching contexts constantly wastes more time than makers expect, and batching also lets you spot a settings drift early, before it affects a whole custom order. Keep a simple spreadsheet of paper brand, weight, and the settings that worked, because the same stock can vary between shipments.
Price with materials, time, and rejects in mind. Even experienced makers occasionally scorch a sheet, so build a small buffer into your per-piece cost and order a little extra cardstock. Customers pay for reliability as much as for the design, and a steady turnaround is what earns repeat business and referrals.
Frequently Asked Questions
Can I print on cardstock and then laser cut it? Yes, this is a common workflow for invitations. Print first with a laser or inkjet printer, then run the cut as a separate pass. Just confirm your ink is laser-safe for the heat and keep the printed side facing down during cutting to protect it from scorch marks.
Why does my paper keep burning instead of cutting cleanly? Burning usually means too much power, too slow a speed, or insufficient air assist. Raise the speed or lower the power in small steps, turn up the air assist, and make sure the material is flat on the bed. Running a quick test grid on scrap saves whole sheets from being ruined.
What paper weight is best for laser cut wedding cards? A 216 to 270 gsm (80 to 100 lb) cover stock is the most reliable choice. It feels premium, stays flat, and cuts without excessive charring. Heavier stocks are possible but need slower speeds and more testing to avoid brown edges.
Closing CTA
A CO2 laser turns a kitchen-table craft into a real, repeatable invitation business, and the techniques above will get you clean, professional results from your very first order. Start with a scrap test grid, keep notes on what works for each paper weight, and let your designs get bolder as your confidence grows. If you are comparing machines for cardstock and paper work, see the laser cutter options at HFLaser for another look at the lineup.

- National hotline: +86-531-86516855/56/57
- Enterprise mailbox:sales@redsaillaser.com
- Address: Room 402E, Tower D, Yinhe Building, 2008 Xinluo Avenue, Shunhua Road Subdistrict, Jinan Area, China (Shandong) Pilot Free Trade Zone


Redsail Tech Co. © 2002-2026. All Rights Reserved.