
What You Can Make with a Paper Laser Cutter
A CO2 laser turns flat sheets of paper and cardstock into crisp, lace-like invitations, tags, and greeting cards that are nearly impossible to cut by hand. From wedding stationery with delicate filigree borders to custom gift tags bearing your logo, the same desktop machine that engraves wood can also slice paper with surprising precision.
This guide walks through the practical side of laser paper cutting: picking materials, preparing your design file, dialing in settings, and building a repeatable workflow. Whether you run a small craft shop or make cards for friends and family, you will finish with the confidence to cut your first sheet cleanly.
Choosing the Right Paper and Cardstock
Not every paper behaves the same under a focused beam. Lightweight printer paper (around 80 gsm) cuts almost instantly but can curl or scorch if the beam dwells too long, while heavier cardstock (200 to 300 gsm) holds its shape beautifully and shows off embossed-style detail. For wedding stationery and keepsake cards, a 250 to 300 gsm uncoated cardstock gives the best balance of rigidity and clean edges.
Avoid sheets with high synthetic content or heavy plastic coatings, because they can melt and leave a gummy residue on the honeycomb bed. Matte and uncoated stocks engrave and cut cleanly, while glossy coated stocks sometimes reflect the beam and cut unevenly. If you want a metallic look, apply a separate foil technique rather than buying a pre-foiled stock that may not cut well.
Always test a small swatch before committing a full sheet. Mark the back with a pencil so you know which side faced up, and keep a notebook of paper weights alongside the settings that worked for each. Over a few projects you build a personal reference chart that removes guesswork from every new order.
Setting Up Your Design File
Start in vector software where every cut line is a hairline stroke (usually 0.001 inch or 0.25 pt) in pure red or the color your controller reserves for cutting. Text and decorative elements should be converted to paths so the laser never substitutes a missing font. Leave a small bridge or uncut tab anywhere a delicate shape might fall out and get lost in the offcut.
For paper crafts like layered cards, design each layer as its own colored line group so you can assign different speeds and powers per pass. Add registration marks or a simple bounding rectangle if you plan to cut a stack of identical sheets from one nested layout. Nesting pieces tightly saves material and lets you produce a full set of invitations in a single run.
Export as SVG, AI, or DXF depending on your machine's software, and double-check the scale by printing the file on plain paper first. A quick paper proof catches spelling mistakes and layout overlaps long before you waste cardstock, and it confirms the design reads well at actual size.
Laser Settings for Clean Paper Cuts
Paper is thin and fragile, so the goal is a fast, low-power pass that severs the fiber without burning. For 80 to 120 gsm paper, try 60 to 100 percent speed with 8 to 15 percent power; for 200 to 300 gsm cardstock, drop speed to 25 to 50 percent and raise power to 18 to 30 percent. These are starting points, and your specific tube and lens will shift them.
Use the lowest power that cuts through cleanly, because excess energy browns the edge. A single light pass is better than multiple heavy ones, and a gentle air assist helps blow away stray sparks that could ignite a curl. Always keep a fire extinguisher or a bowl of water nearby when cutting paper, since thin stock is the easiest material to accidentally set alight.
If edges still brown, lower power another 3 to 5 percent and increase speed slightly. A clean white cut line is the sign you have it right, and that is what makes laser cut cards look professionally produced rather than homemade.
A Simple Workflow for Invitations
Begin by nesting your design to fill the sheet, leaving at least 10 mm between pieces so the frame stays stable. Tape or lightly mask the sheet to the honeycomb with heat-resistant tape at the corners so it cannot lift into the beam. Lifting paper is the single most common cause of a missed or ragged cut.
Run a low-power outline or frame pass first to confirm placement, then execute the full cut. After the pass, let the bed cool for a moment before touching the sheet, because freshly cut paper edges are hot and brittle. Use a soft brush or tweezers to pop out the cut pieces rather than flexing the whole sheet, which can tear fine interior bridges.
Finally, assemble layered pieces with a thin glue dot or double-sided tape, and store finished stationery flat between tissue sheets. Building this routine means a batch of fifty invites takes one focused afternoon instead of a stressful evening before the event.
Project Ideas: Tags, Cards, and Stationery
Once you are comfortable, branch out from plain rectangles into shapes that show off the laser's strength:
- Cake toppers and cupcake flags cut from sturdy cardstock
- Monogram gift tags with a matching envelope liner
- Shadow-box layered paper art for nursery or wedding decor
- Place cards with individually engraved guest names
- Paper lace doilies and bookmark fringes
- Greeting cards with a cut-out window revealing a photo behind
Each of these builds on the same file setup and settings you already tuned, so the learning curve stays gentle. They also make excellent products for a craft fair table or an online listing, where personalization and handmade detail sell.
Layering and Assembly Tips
Layered paper crafts gain depth when you stack two or three cut sheets with a small foam spacer between them. Cut the base shape from a heavier 300 gsm stock for stability, then layer a lighter 160 gsm filigree on top so the pattern reads clearly. A 1 to 2 mm foam dot in each corner lifts the top layer just enough to cast a soft shadow.
When gluing, less is more. A tiny glue dot at each corner and one in the center prevents warping that a long bead of liquid glue would cause. If you plan to mail the finished piece, test it inside its envelope first, because layered cards are thicker than a standard invite and may need a rigid mailer.
For wedding stationery sets, cut a few spare pieces of every layer so a later repair or a lost RSVP card is easy to replace. Keeping a labeled folder of your cut files and a stack of spares turns one project into a reusable template for future events.
Avoiding Common Paper-Cutting Problems
Scorched edges usually mean too much power or too slow a pass; reduce one variable at a time until the edge is clean. Torn or uncut sections suggest the sheet lifted or the focus was slightly off, so re-tape flat and re-check focal distance against the manufacturer's gauge. A piece that falls out and jams the head is a reminder to leave small bridges in future designs.
Warping happens when one side heats faster than the other, so keep passes quick and let the bed breathe between sheets. If fine interior details keep breaking, thicken the lines by 0.2 to 0.5 mm in your design rather than fighting the material. Most paper problems are solved by slowing down, cooling, and simplifying the geometry slightly.
Dust and tiny fibers left on the bed can also smolder after a run, so brush the honeycomb clean between batches. A tidy bed is not just tidier, it is safer and keeps your next sheet from picking up scorch marks from leftover debris.
Frequently Asked Questions
Q: Can a laser cutter really cut through thick cardstock without burning it?
Yes, with the right settings. Thick cardstock needs a slower, slightly higher-power pass than thin paper, but keeping the energy just above the cutting threshold prevents browning. Test on a scrap first, and use light air assist to clear sparks so edges stay clean.
Q: Do I need special software to design paper crafts?
Any vector program that exports SVG, AI, or DXF works well. The important habit is setting cut lines as thin hairlines and converting text to paths before exporting. Free and paid options both handle most invitation and tag designs without trouble.
Q: Is cutting paper on a laser safe?
It is safe when you supervise the run and keep water or an extinguisher close. Paper ignites more easily than wood, so never leave the machine unattended and avoid stacking sheets. Short, fast passes keep heat under control and reduce fire risk.
##
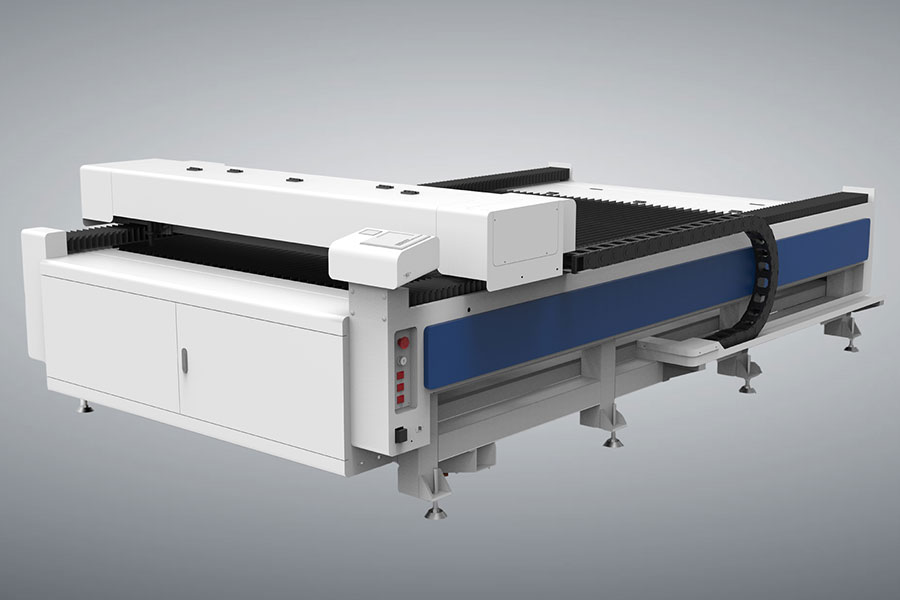
Paper crafting with a laser opens a calm, rewarding corner of the maker world where a single afternoon can produce a whole set of keepsake stationery. Start with one design, tune your settings on scrap, and let each new project teach you a little more about your machine. For higher-volume production cutting, also check our sister brand's industrial laser cutter range.

- National hotline: +86-531-86516855/56/57
- Enterprise mailbox:sales@redsaillaser.com
- Address: Room 402E, Tower D, Yinhe Building, 2008 Xinluo Avenue, Shunhua Road Subdistrict, Jinan Area, China (Shandong) Pilot Free Trade Zone


Redsail Tech Co. © 2002-2026. All Rights Reserved.