
Why wattage is a real decision
When you shop for a craft laser cutter, the number that gets quoted first is wattage, and for good reason: it sets what you can cut, how fast you can do it, and how big the machine tends to be. But more watts is not automatically better. A 100W tube in a home bedroom is overkill for keychains and brings more size, more exhaust, and more cost than a beginner needs. The goal is to match power to the work you actually do.
This guide breaks down the three common craft tiers, 30-40W, 60W, and 80-100W, and what each one comfortably handles in wood and acrylic. It also covers the speed differences that matter for a side business and a realistic upgrade path so you buy once, then grow, instead of guessing and regretting. Picking the best laser for DIY use starts with honest volumes, not max specs.
The 30-40W tier
A 30-40W CO2 laser is the classic desktop entry point. It engraves beautifully on wood, leather, slate, and anodized aluminum, and it cuts thin stock competently. On a 40W tube, you can expect to cut 3mm plywood and 3mm acrylic in a single pass at a moderate speed, and 4-5mm stock with a slower pass or two. It will struggle with anything past about 6mm, where multiple passes get slow and edges brown.
This tier suits makers focused on engraving: tumblers, signs, tags, and thin charms. If your catalog is mostly surface work with occasional light cutting, 40W is plenty and keeps the machine small enough for a spare room. The tradeoff is time; a 40W cutting a 6mm board takes noticeably longer than a 60W, so volume is the limit, not capability. A 40W 60W laser crafts comparison usually starts here for budget and space.
- Engraves: wood, leather, slate, anodized aluminum, glass.
- Cuts well: up to 3mm wood and acrylic, thin veneers.
- Cuts slowly: 4-6mm with multiple passes.
- Best for: engraving-heavy shops and tight spaces.
The 60W sweet spot
Sixty watts is where most serious home and small-shop makers land, and it earns the reputation as the balanced choice. A 60W tube cuts 5-6mm plywood and acrylic cleanly in one pass and handles 8-10mm at a slower speed, while still engraving with the fine detail a craft business needs. The speed gain over 40W is real: same job in roughly two-thirds the time, which adds up across a night of production.
For a laser power for crafts decision, 60W is the point where cutting becomes a first-class feature rather than a chore. You can cut box joints, thicker signs, and multi-layer wood models without babysitting passes. It still fits a sturdy bench or a small floor stand, so it bridges the desktop and production worlds. If you are unsure and can afford it, 60W removes more "can I make this" limits than any other single upgrade.
- Engraves: everything the 40W does, faster.
- Cuts well: 5-6mm wood and acrylic in one pass.
- Cuts slowly: 8-10mm stock.
- Best for: makers who both cut and engrave regularly.
The 80-100W tier
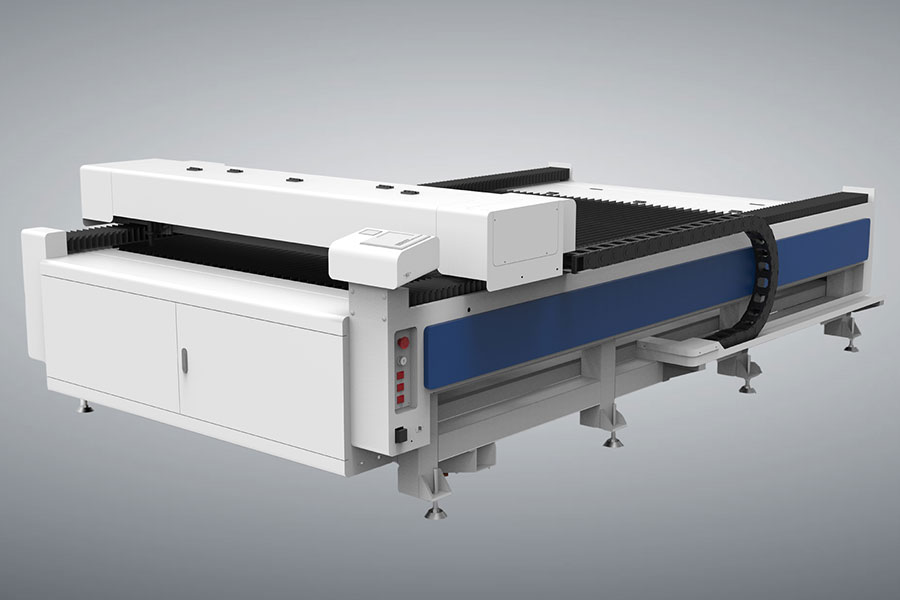
Eighty to 100W machines are floor models built for throughput. They slice 10-12mm acrylic and plywood with confidence, cut thicker hardwoods, and engrave so fast that batch work changes character. The cost is size, weight, and a serious exhaust requirement; these are not bedroom tools. They suit a maker whose bottleneck is machine time, not ideas.
The engraving quality at this tier is excellent, but finer photo detail does not improve simply because watts go up; focus and DPI still rule. The real win is cutting thick material and running long jobs without the slow passes a smaller tube needs. A choose laser wattage call at this level is really a business-capacity call: do you sell enough volume to justify the footprint and the power bill?
- Engraves: fast, all common materials.
- Cuts well: 10-12mm acrylic and ply.
- Cuts slowly: thicker hardwoods beyond 12mm.
- Best for: production shops and thick-material work.
Engraving versus cutting tradeoffs
Wattage helps cutting far more than engraving. Engraving depth is set mostly by speed and power balance, and a 40W can make a mark as fine as a 100W with the right settings; it just takes longer over a big area. Cutting, by contrast, is where watts directly buy thickness and speed, because severing material needs energy delivered fast enough to melt through before the edge recools.
So match the tube to your cutting needs first, and trust that engraving will follow. A maker who only etches tumblers should not buy 100W; a maker cutting 10mm acrylic signs daily will hate a 40W. The best laser for DIY is the one whose cutting range covers your thickest regular material with one comfortable pass, leaving engraving as a free benefit on top.
There is also running cost to weigh. A higher-watt tube draws more power and, more importantly, a 100W glass tube has a finite life measured in hours regardless of how lightly you use it, so a smaller tube you actually keep busy may cost less per year than a giant one that ages while idle. Match capacity to real weekly hours, not to ambition.
Desktop versus floor models
Higher wattage usually means a bigger chassis, because the tube is longer and the bed is often larger to use that power. A 40W desktop unit slides onto a workbench and stores when not in use. A 100W floor model needs a dedicated spot, a proper stand, and a robust exhaust run to outside. Think about your room before the spec sheet; a machine you cannot vent safely is no bargain.
Floor models also tend to have bigger beds, 900x600mm and up, which lets you nest many small parts or cut a full sheet of ply. If your products are small and your volume modest, a desktop 60W on a bench may out-earn a giant 100W you underuse. The craft laser cutter you keep busy beats the one that impresses visitors.
A sensible upgrade path
Most makers follow a predictable arc: start at 40W to learn, move to 60W as cutting demand grows, and add a 100W only when volume or thick material makes the smaller tube the bottleneck. Avoid skipping to 100W on day one unless you already have orders for thick cuts; you pay for capacity you may not use, and the learning curve is the same regardless of watts.
Keep your first files and settings as you grow, because they transfer across tiers with only speed and power tweaks. When you do upgrade, sell the old machine to a beginner or keep it as a backup so one service call does not stop your shop. A staged path keeps cash flow sane and lets each machine pay for the next.
Frequently Asked Questions
Is 40W enough to start a craft business?
For engraving-heavy and thin-cut work, yes. It cuts 3mm stock and etches most materials well. Move up only when you regularly need thicker cuts or faster batch times.
Does higher wattage engrave finer detail?
Not by itself. Detail comes from focus, DPI, and dithering. Higher watts mainly add cutting thickness and speed, so buy watts for cutting, not for sharper engraves.
Should a beginner buy 100W?
Usually no, unless thick-material cutting is already a core product. A 60W covers most craft needs and a bedroom far better, with lower cost, size, and exhaust demands.
Choose your power with confidence
Match wattage to the thickest material you cut regularly and the volume you actually run, not to the biggest number on the page. Start where you are, learn the settings, and let demand pull you up to the next tier when the time is right. To see how each tier fits your space and budget, compare the Redsail laser cutter range by bed size and tube. For a different spec perspective, the HFLaser laser cutters catalog is a helpful cross-check before you buy.

- National hotline: +86-531-86516855/56/57
- Enterprise mailbox:sales@redsaillaser.com
- Address: Room 402E, Tower D, Yinhe Building, 2008 Xinluo Avenue, Shunhua Road Subdistrict, Jinan Area, China (Shandong) Pilot Free Trade Zone


Redsail Tech Co. © 2002-2026. All Rights Reserved.