
Why Wood Is the Best First Material
Wood is the classic first material for any new CO2 laser owner, and for good reason: it is affordable, widely available, and forgiving while you learn. A single sheet of birch plywood yields dozens of small projects, so mistakes cost almost nothing. The natural grain also gives every make character that synthetic materials cannot match, which is perfect for gift and craft markets.
From a maker's view, wood spans the whole skill range. You can start with a simple engraved bookmark on day one and work up to layered shadow boxes and finger-jointed boxes within a month. Because the same machine both cuts and engraves, one file can produce a finished object rather than just a flat shape. That versatility is why so many home businesses begin with wood.
Picking Wood That Cuts and Engraves Well
Not every wood behaves the same, and the wrong sheet wastes time. Baltic birch plywood in 3–6 mm is the beginner favorite: it cuts cleanly, layers well, and costs little. Basswood is soft and pale, ideal for detailed engraving and painted finishes. MDF cuts smoothly but engraves with more residue and dust, so reserve it for painted pieces rather than show surfaces.
Avoid treated, stained, or unknown reclaimed wood, which can off-gas or contain glues and metals that damage your machine. Hardwoods like maple and walnut engrave beautifully but cut slower and need more power, so save them for special pieces. For consistent results, buy a known brand of laser-grade plywood and keep a scrap bin of offcuts for testing new settings.
A starter wood checklist:
- Baltic birch plywood, 3–6 mm, for general cutting.
- Basswood sheets for light, detailed engraving.
- MDF for painted, low-cost shapes.
- A scrap box of offcuts for daily test cuts.
Getting Your Speed and Power Right
Wood settings depend on thickness and density, but a dependable baseline gets you close. For 3 mm birch plywood on a 40–60 W CO2 laser, cut at 200–350 mm/s and 35–55% power, often with one or two passes. Engraving raster work reads well at 300–500 DPI, with 120–250 mm/s at 25–45% power for a clean burn. Thicker 6 mm stock needs roughly half the speed or an added pass.
Always run a test grid on scrap before a real piece, because two sheets labelled the same can differ. If cuts stop short, slow down 15% or add a pass; if edges char heavily, raise speed or drop power a few points. Clean the lens and align the beam focus to the material's surface, since wood is unforgiving of bad focus and shows it as a tapered or smoky edge.
Troubleshooting wood cuts:
- Incomplete cut: slow 15% or add a second pass at the same power.
- Heavy char: raise speed or lower power 3–5% and boost air assist.
- Uneven burn: check focus distance and clean the lens.
- Tear-out on plywood: use sharper vector settings and mask the surface.
12 Wood Laser Projects to Try
Here are twelve approachable makes that build skills and stock a shop or gift table:
- Engraved keychains with names or coordinates.
- Circle coasters with monograms or maps.
- Wall signs and quotes for nurseries or kitchens.
- Holiday ornaments with dates and initials.
- Picture frames with routed, laser-cut corners.
- Bookmarks with line art and a tassel hole.
- Simple jigsaw puzzles from a single engraved sheet.
- Wooden earrings and pendants with stacked layers.
- Recipe and cutting boards engraved with family notes.
- Toy cars, trains, and building blocks for kids.
- Plant markers and garden tags with handwritten fonts.
- Desk name plates and sign-in plaques for offices.
Each project teaches a different skill, from tight curves to layered glue-ups, and most use offcuts you already have. Start with keychains and coasters, then move to layered signs and boxes as your confidence grows.
Finishing and Assembling Your Makes
Finishing turns a raw cut into a product. Light sanding removes char and softens edges; a brush of food-safe oil suits serving boards, while clear spray or polycrylic protects wall art. Paint can fill engraved lines for a two-tone effect, and wood stain deepens the natural burn contrast. Always finish after cutting so the coating does not scorch under the beam.
Assembly often needs no hardware. Wood glue and masking tape clamps handle boxes and layered signs, and small magnets or hinges add function to lids. Because the laser cuts joinery precisely, finger joints and slots line up without measuring. Keep a finishing station with sandpaper, brushes, and cloths so every piece leaves the bench ready to sell or gift.
Turning Wood Makes into Income
Wood projects are a friendly entry to a maker side business because materials are cheap and demand is steady. Local markets, gift shops, and online platforms all sell laser wood goods, and personalization commands a premium. Bundle a bestseller, like a keychain plus a coaster, to raise the average order without much extra time.
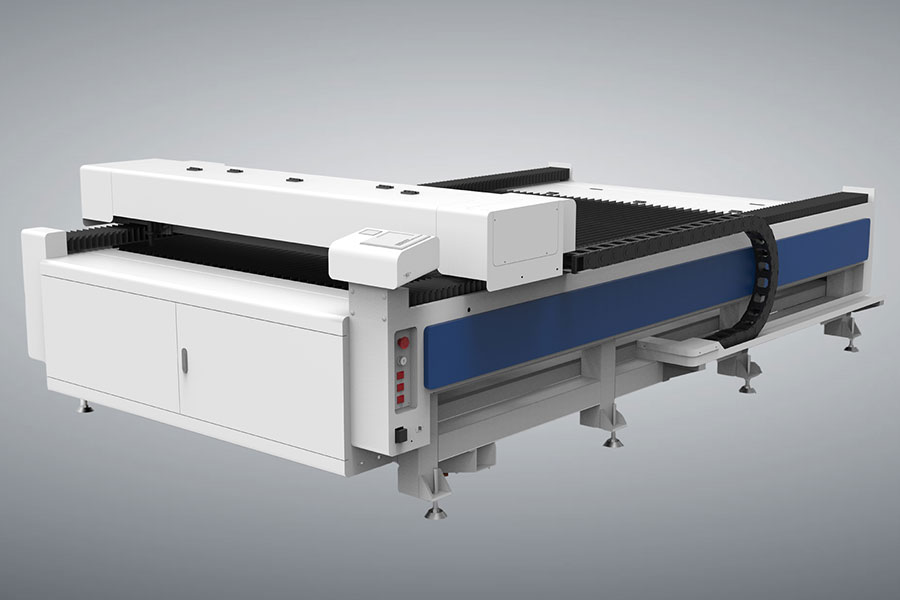
Document your process with photos, since customers love seeing the maker behind the product. Offer custom engraving as an upsell, and keep a few blank blanks on hand so rush orders are easy. As orders grow, a flatbed CO2 laser cutter with a bigger bed lets you nest many parts per sheet and cut batch costs dramatically.
Common Wood Laser Mistakes to Avoid
Every newcomer makes a few avoidable errors, and knowing them saves material and temper. The most common is cutting without a test on scrap, which leads to a pass that stops short or chars the surface beyond saving. A two-minute test grid on the exact sheet you plan to use removes the guesswork and protects your real piece. It also teaches you how your specific tube behaves on a given thickness, which is knowledge you reuse on every later project. Another frequent slip is wrong focus: if the beam is not tuned to the material's top surface, cuts come out tapered and engraving looks washed out, so always set focus to the sheet you loaded.
Leaving the lens dirty is the silent killer of clean work. Dust and residue from MDF or plywood build up fast and scatter the beam, so wipe the lens and mirrors on a regular schedule. A clean optic is the cheapest upgrade you can make to cut quality. Also resist the urge to crank power to fix a slow cut; often a small speed drop does the job with far less scorching and a neater edge that needs less sanding later.
Poor ventilation lets haze settle back on the work and stain light woods, so keep air assist on and the exhaust steady. Match the material to the project as well: basswood for fine engraving, birch ply for structure, and MDF only when you plan to paint. Mixing them up wastes both time and stock. With these habits in place, your reject rate drops and your confidence rises quickly, turning a frustrating first month into a smooth, profitable start.
Finally, document everything. Note the wood, thickness, speed, power, and DPI that worked for each project in a simple log. When a customer reorders a coaster set six weeks later, that log lets you reproduce the exact burn without a fresh test. Good records are what separate a hobbyist from a maker who can promise consistent results and deliver them on time.
FAQ
What wood should a beginner buy first?
Start with 3–4 mm Baltic birch plywood and a few basswood sheets. Both cut and engrave predictably, cost little, and suit most small projects while you learn your machine's settings.
Why does my wood cut char at the edges?
Char usually means too much heat, so raise speed or lower power a few percent and keep the air assist strong. A clean lens and correct focus also reduce smoking and give a cleaner edge.
Can I sell laser-cut wood items legally?
Yes, you can sell items you make, but avoid copyrighted characters, logos, or sports marks unless licensed. Stick to original art, public-domain designs, or paid licensed files to stay safe.
Begin Your Wood Laser Journey
Wood is the most rewarding material to learn on, and these twelve projects will build real skills fast. Pick a known plywood, lock in a clean cut setting, and make a few gifts before listing anything for sale. If you later outgrow a desktop bed, HF Laser builds larger flatbed and auto-feeding CO2 machines that scale with your business.

- National hotline: +86-531-86516855/56/57
- Enterprise mailbox:sales@redsaillaser.com
- Address: Room 402E, Tower D, Yinhe Building, 2008 Xinluo Avenue, Shunhua Road Subdistrict, Jinan Area, China (Shandong) Pilot Free Trade Zone


Redsail Tech Co. © 2002-2026. All Rights Reserved.