
Why Calibration Matters Before You Cut
A laser cutter that is even slightly out of alignment will drift across the bed, leaving cuts that are not square, edges that taper, and corners that never quite meet. Before you blame your material or your design file, the first thing to check is the machine itself. A proper laser calibration routine takes about twenty minutes and saves you far more than that in wasted stock and frustrated re-runs.
In this guide you will learn a practical, repeatable tune-up process that covers mirror and lens alignment, belt tension, squareness of the gantry, and focus height. We will walk through the tools you need, the step-by-step checks, and the small adjustments that make the biggest difference. By the end you should be able to cut a clean square and a straight line anywhere on the bed with confidence.
Start with a Clean Machine
Before any adjustment, power down and clean the optics. Dust and residue on the mirrors and lens scatter the beam and can mimic alignment problems. Remove the lens and mirrors according to your manual, wipe them with a lint-free swab and pure isopropyl alcohol, and let them dry completely before reinstalling.
While you are in there, clear out the honeycomb or knife bed of small offcuts and ash. A cluttered bed can deflect your visual reference and make it hard to see your test burns. A clean starting point is the foundation of accurate laser alignment, and it also helps your exhaust system pull smoke away more efficiently during the actual test cuts.
Checking Mirror and Beam Alignment
The beam in a CO2 laser bounces off two or three mirrors before reaching the lens. If any mirror is off by even a fraction of a millimeter, the spot lands off-center at the far corners of the bed, which is the most common cause of angled cuts. Tape a piece of scrap material or thermal paper at the near corner, fire a low-power pulse, then move the head to the far corner and pulse again.
The goal is for the burn dot to stay centered in the same hole as the head travels. If it walks off to one side, loosen the mirror mount set screws and nudge the mirror until the dot returns to center. Work from the first mirror to the last, re-checking each time, because adjusting one mirror shifts the whole chain. This mirror check is the single most important part of any laser calibration routine.
When the dot stays centered at every position, tighten the mounts gently and run one more pulse at each corner to confirm nothing shifted during tightening. Only after the beam is stable should you move on to mechanical squareness.
Squaring the Gantry and Frame
Even with perfect mirrors, a frame that is not square will cut trapezoids instead of rectangles. Place a carpenter's square or a known-good right-angle jig against the rail and the bed edge. Measure the distance from the rail to the far side of the bed at the front and at the back; they should match within about a millimeter.
If they do not, most desktop frames have adjustable feet or eccentric spacers that let you true the frame. Some gantries also have a belt-sync adjustment where the two sides can be brought into parallel. Take your time here, because square cuts laser work depends entirely on this geometry being correct, and a skewed frame cannot be fixed by software.
It helps to mark the bed with a permanent alignment grid or to keep a calibrated test square nearby. That way you can spot frame drift early, long before it shows up in a customer order or a gift you spent an hour preparing.
Setting Proper Belt Tension
Loose belts let the head overshoot and bounce, producing wavy cuts and rounded corners on what should be crisp angles. Too-tight belts wear the stepper motors and idler bearings prematurely and can even skip teeth under load. The right tension is a gentle thrum with a small amount of give when you press the belt with a fingertip.
On machines with separate belts for the X and Y axes, tension both evenly. If one side is tighter, the head will track diagonally and your square cuts laser test will fail on one axis only. After adjusting, run a few fast direction-change moves and listen; a quiet, even motion means the tension is balanced and the head is not fighting the belt.
Replace belts that look glazed, cracked, or stretched, because no amount of tensioning will restore a belt that has already taken a permanent set. A fresh belt is cheap insurance against ruined jobs.
Focus Height and Spot Size
A beam that is out of focus is wider than it should be, so it removes more material than intended and leaves a melted, tapered edge instead of a clean wall. Use the supplied focus gauge or run a ramp test: cut a series of short lines at slightly different heights and pick the setting with the narrowest kerf and the cleanest wall.
Remember that focus changes with material thickness, so keep a small chart taped to the machine listing the focus offset for your common stock, from thin veneer up to half-inch acrylic. Re-check focus whenever you switch material families, since the spot size at the surface is what gives you clean, straight cuts and repeatable results.
A good habit is to verify focus at the start of every session, because a knocked lens holder or a changed table height is an easy thing to miss until the first cut looks wrong.
A Simple Square Test to Verify
Cut a square from scrap and measure all four sides and both diagonals with calipers. In a perfectly tuned machine the diagonals are equal and the sides match your design within a few hundredths of a millimeter. If one diagonal is long, the frame is skewed; if sides are uneven, a belt or motor needs attention.
Make this square test part of your regular laser cutter tune-up, ideally once a month or after any shipping, moving, or heavy use. It is the fastest way to catch drift before it ruins a real job, and it only costs a few seconds of scrap material.
Keep a log of your test results with the date and any adjustments made. Over time that log tells you how stable your machine is and helps you predict when the next full calibration will be due.
Frequently Asked Questions
How often should I calibrate my laser cutter?
For a hobby machine used a few times a week, a full laser calibration every one to three months is plenty, with a quick square test before important jobs. If you move the machine, change the lens, or notice drifting cuts, calibrate immediately. Busy small businesses running daily should check alignment weekly and keep a written maintenance schedule.
Why are my cuts tapering at the edges?
Edge taper almost always comes from a beam that is out of focus or a mirror that is slightly off, sending the beam in at an angle. Re-run the focus ramp test and the mirror alignment pulses. Also confirm the lens is seated flat and clean, since a tilted lens produces the same taper and is easy to overlook during a rushed setup.
Can loose belts really ruin square cuts?
Yes. Even a small amount of belt slack lets the head lag behind the commanded position during direction changes, which rounds corners and skews rectangles. Proper belt tension is a core part of keeping square cuts laser accurate, so include it in every tune-up and replace belts that have stretched beyond adjustment.
Get Started Today
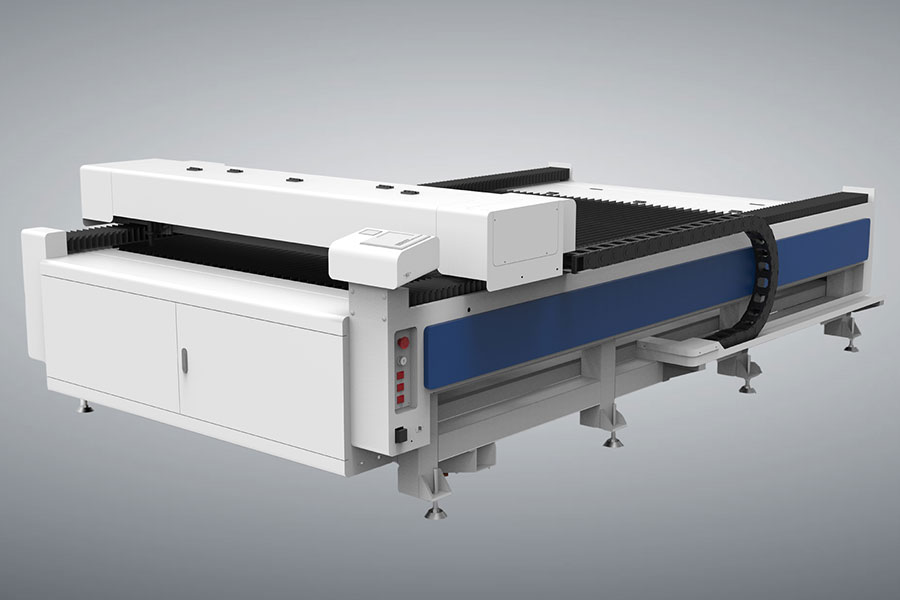
A well-tuned machine is the difference between fighting your cutter and flowing with it. Spend the twenty minutes on calibration and you will waste less material and enjoy cleaner results on every project. To see what a properly maintained desktop CO2 laser engraver can do, explore the Laser Cutter lineup at RedSail and find a machine that fits your workshop.
For higher-volume production cutting, explore the HF Laser industrial CO2 laser cutter lineup.

- National hotline: +86-531-86516855/56/57
- Enterprise mailbox:sales@redsaillaser.com
- Address: Room 402E, Tower D, Yinhe Building, 2008 Xinluo Avenue, Shunhua Road Subdistrict, Jinan Area, China (Shandong) Pilot Free Trade Zone


Redsail Tech Co. © 2002-2026. All Rights Reserved.