
Intro
A personalized cutting board is one of the most loved gifts a maker can sell. Names, dates, recipes, and family crests turn a plain slab of wood into a keepsake that gets used and displayed every day.
With a CO2 laser you can engrave cutting boards and serving trays quickly and consistently, even in small batches for a weekend craft fair. This guide walks through wood selection, surface prep, realistic settings, and the food-safe finishing that keeps your work both beautiful and safe to use around food.
Choose the right wood
The wood you start with decides how clean your engraving looks and how long the board lasts in a real kitchen. Maple, walnut, and bamboo are the three materials makers reach for most often, and each behaves differently under the beam.
Maple is the maker favorite for good reason. It has a tight, even grain and a light color that engraves to a warm caramel contrast, so names and fine text read clearly. Hard maple is also durable enough for daily chopping, which means your gift keeps earning compliments long after the sale.
Walnut gives a rich, dark background. Engraving shows as a lighter tone that looks elegant for weddings, anniversaries, and housewarmings. It is a little softer than maple, so keep power moderate to avoid scorching the surface.
Bamboo is affordable and eco-friendly, but it is a layered composite that can engrave unevenly. If you use bamboo, keep power low and always test a corner first. Avoid open-grain woods like oak for fine lettering, because the deep pores break up small characters and make them hard to read.
For a laser serving tray with a raised edge, pick a flat central panel and keep your artwork inside that area so the tray's rim never casts a shadow across the beam path.
Clean and prep the surface
New boards often arrive with mill residue, handling oils, or fine dust that scorches instead of engraving cleanly. A few minutes of prep pays off in a crisp result.
Start by wiping the board with a damp cloth and a drop of mild dish soap, then dry it completely. Let it rest in your workshop for a day so the moisture content equalizes with the room air; wood that is still off-gassing internal moisture will engrave patchy and can even warp slightly under heat.
Lightly scuff any glossy or pre-finished boards with 320-grit sandpaper so the beam bites evenly, then wipe again with a tack cloth to remove fine dust. A clean, dry, flat surface is the single biggest factor in a sharp engraving, and it is the step beginners skip most often.
Plan your design placement
Measure the usable flat area and leave a margin of at least 15 mm from any edge, handle junction, or routed channel. Crowding the artwork toward the rim invites uneven burns where the surface curve falls out of focus.
Center your text with your software's alignment tools and preview the job at low power, around 5 to 10 percent, to burn a faint registration mark you can check before the real run. For a personalized cutting board with a handle, keep the artwork on the main panel and let the handle stay clear so the board still hangs nicely on a wall or hook.
If you are engraving a set, build one master layout in your design software and nudge each board into the same position with a simple jig made from scrap wood. Repeatable placement is what lets you scale from one gift to twenty without re-aligning every time.
Speed and power starting points
Treat every number below as a starting point to confirm on scrap material, then nudge from there. Wood varies batch to batch, so your first test swatch is not wasted time, it is quality control.
- Maple, light engraving: 30 to 40 percent power, 250 to 350 mm/s, 300 to 500 DPI.
- Walnut, deeper tone: 35 to 45 percent power, 200 to 300 mm/s, 400 to 600 DPI.
- Bamboo: 25 to 35 percent power, 300 to 400 mm/s, 300 to 500 DPI.
- For a filled area or logo, slow down to 150 to 250 mm/s so the burn is even across the whole shape.
Higher DPI adds detail but also adds heat; if you see dark halos around letters, drop DPI before you drop power. A wood board laser job that runs too hot will scorch the surrounding grain and leave a messy border that no amount of finishing hides.
Avoid burns on end grain
End grain, the cut ends of the board, absorbs energy differently than face grain and burns darker and patchier. Orient your artwork along the long face grain and never across the ends of the board.
If you must engrave near an end, mask the area with painter's tape and peel it after the job; the tape absorbs stray heat and keeps the grain clean. Lower power by 5 to 10 percent on the end-grain zone, or split the design so end-grain sections receive a lighter pass than the center.
Use multiple light passes, two at 20 percent rather than one at 40 percent, to reduce local heat buildup. Consistent focus height matters too: a board that rocks by even 1 mm throws the beam out of its sweet spot and creates uneven edges that look like a focus problem even when your lens is fine.
Apply a food-safe finish
Once the engraving has cooled and been brushed free of ash, protect the wood so the gift lasts. Mineral oil and pure wax are inert and food safe, and they also make the engraved contrast pop.
Wipe the surface with a little mineral oil and let it soak in for about 20 minutes, then buff off the excess and apply a second coat the next day. For extra protection on a board that will see real use, follow with a food-safe beeswax or board cream, warmed between your hands and rubbed in along the grain.
Avoid any finish containing harsh solvents, polyurethane, or unknown additives on a surface that touches food. Those coatings may look tough but they are not safe where a knife will later cut, and customers rightly expect a kitchen gift to be trustworthy. If you want a glossy look, stick to repeated oil and wax coats built up over a week.
Care instructions for your customers
Include a small printed card with every order so the board lasts and your review stays five stars. Hand wash only, never soak, and never run it through a dishwasher, because heat and steam open the grain and fade the engraving.
Recommend re-oiling monthly or whenever the wood looks dry, and tell buyers the engraved area is decorative. The flat cutting side should be the unmarked face when possible, with serving and display on the engraved side.
If fine detail fades from heavy scrubbing over the years, the design can be lightly re-engraved, which is a nice upsell story for repeat customers. These small touches turn a one-time buyer into a regular gift customer who comes back for weddings, holidays, and teacher presents.
Frequently Asked Questions
Can I engrave a board that is already oiled?
Yes, but wipe it clean and let it dry first. Old oil can smoke and leave sticky residue, so a light sanding helps the beam bite and gives you a cleaner, more even burn.
Will the engraving wear off over time?
Surface engraving is permanent in the wood, but heavy knife use on the marked face can blur fine detail. Recommend using the engraved side for serving and the plain side for cutting to keep names and dates crisp.
Is bamboo as good as maple for laser gifts?
Bamboo is cheaper and eco-friendly, but its layered grain engraves less evenly. For premium laser kitchen gifts, maple and walnut look more refined and sell at a higher price point.
How do I stop dark edges around text?
Lower DPI slightly, reduce power, and slow the speed a touch. Masking the area with tape before engraving also keeps the surrounding grain clean and prevents the halo effect.
Closing
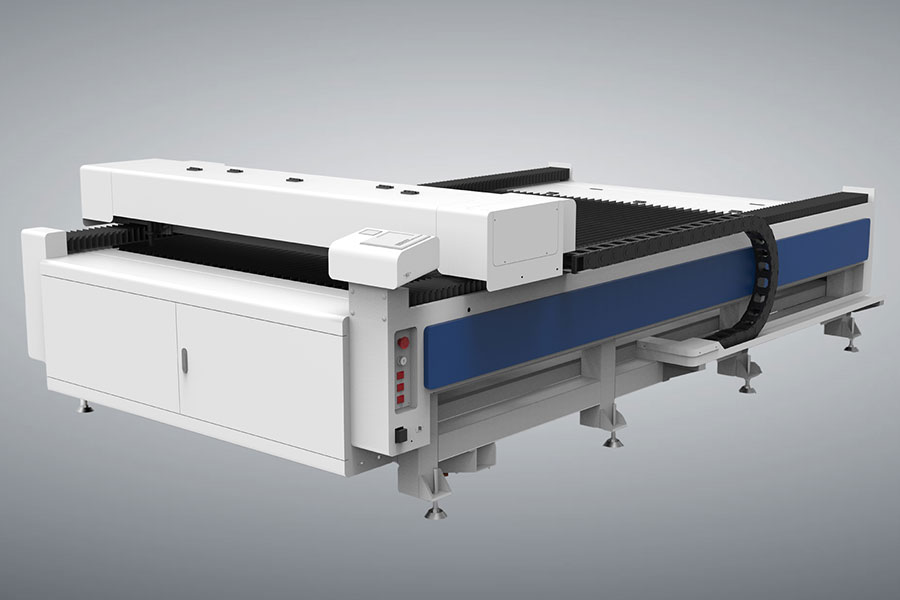
A CO2 laser turns everyday boards into bestsellers, and the same machine handles trays, coasters, and signs for a full kitchen gift line. If you are comparing options across brands, it is worth reviewing the cutter range at Hefei Laser's laser cutter page to see how different builds fit your workshop.

- National hotline: +86-531-86516855/56/57
- Enterprise mailbox:sales@redsaillaser.com
- Address: Room 402E, Tower D, Yinhe Building, 2008 Xinluo Avenue, Shunhua Road Subdistrict, Jinan Area, China (Shandong) Pilot Free Trade Zone


Redsail Tech Co. © 2002-2026. All Rights Reserved.