
Intro
Custom acrylic keychains are one of the easiest wins for a new laser owner, because the material is cheap, the cuts are clean, and buyers love a personalized charm. A single sheet of cast acrylic can become a dozen gifts, party favors, or shop listings in one short session.
This guide walks through picking the right plastic, laying out your design, dialing in cut and engrave settings, and finishing pieces so they look shop-ready. Treat every number below as a starting point to confirm on scrap before a real run.
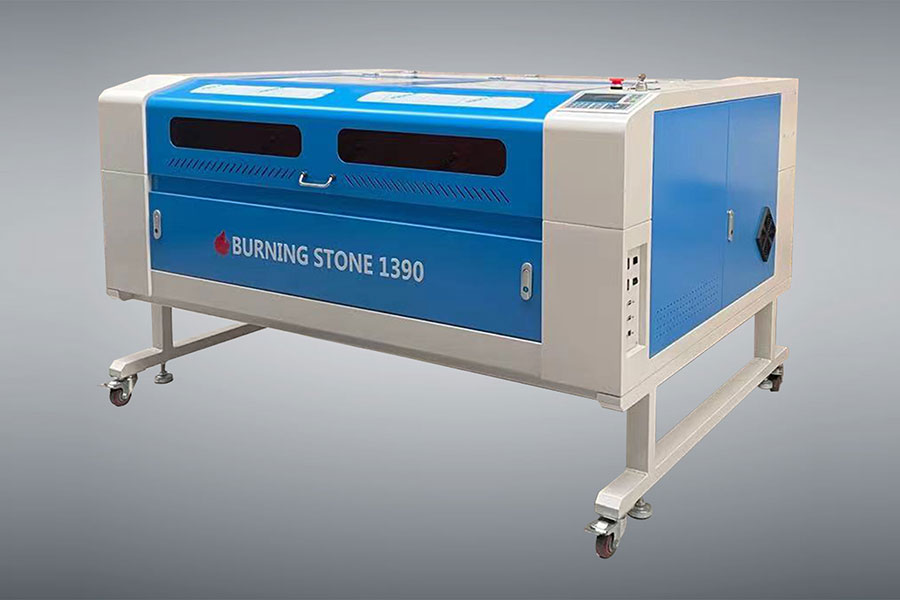
Choosing Cast vs Extruded Acrylic
Cast acrylic is the material most acrylic charm maker sellers reach for. It cuts with a smooth, flame-polished edge and engraves with a frosted, even bite that reads clearly at small sizes. It is slightly more expensive but far more predictable on a CO2 laser.
Extruded acrylic is cheaper and great for pure cutting, but it tends to melt and curl at the edge and can leave a rougher finish. It also engraves less crisply because the material has internal stress lines. Use it for bulk shapes where you do not need a pretty engraved face.
A simple test: engrave a tiny line on each type. Cast acrylic goes frosty white; extruded often goes gooey or uneven. Once you see the difference you will know which to stock for laser acrylic crafts.
Color and clarity also matter for the look. Transparent and frosted acrylic show the engrave as a soft white scatter that reads best with bold art, while solid black or mirrored acrylic gives the strongest contrast for fine text. Keep a small range of colors on hand so a custom request never means a special trip to the supplier.
Designing and Nesting in LightBurn
Draw your charm shape as a closed vector, then add a small inner hole (about 3 to 4 mm) for the keyring near an edge, not the center, so it hangs straight. Keep fine text above 3 mm tall so it survives the engrave pass.
Nesting is how you squeeze more charms per sheet. Place shapes edge to edge with a 2 to 3 mm gap so the beam never overlaps a neighbor, and rotate irregular pieces to fill corners. A 12x20 inch sheet can hold 20 to 40 small charms depending on size.
If you want a preprinted image under the acrylic, engrave the back so the front stays glossy and scratch-safe. Many DIY keychain sellers print UV stickers and seal them, but a direct engrave is tougher and needs no extra supplies.
Remember kerf, the width the beam removes, when spacing shapes. At 3 mm acrylic the cut removes roughly 0.1 to 0.2 mm, so leave at least that gap or tightly nested pieces can fuse at the corners. LightBurn shows the kerf as a thin line if you enable kerf offset, and a half-millimeter buffer saves you from prying apart stuck charms with a knife.
Cut vs Engrave Order
Always engrave first, then cut. If you cut the outline before engraving, the loose piece can shift under the beam and your art ends up off-center or doubled. Engraving a still-anchored sheet keeps everything locked in place.
Set your engrave layer to low power so it frosts the surface without melting through, and your cut layer to higher power with slower speed for a clean through-cut. Keep the two layers on separate colors in LightBurn so you can run them as one job in the right order.
For charms with both a cut outline and a scored fold or detail line, use three layers: engrave (fill), score (thin line), then cut (outline). The machine handles the sequence automatically once the order is set.
Speed and Power Starting Points
For 3 mm cast acrylic, try a cut at 60 to 80 percent power and 8 to 15 mm/s, or a faster 90 to 100 percent at 20 to 30 mm/s on a stronger tube. The goal is one clean pass with no hanging tabs; if edges string, slow down or add a few percent power.
Engraving the face on 3 mm acrylic works around 25 to 40 percent power at 200 to 400 mm/s, 300 to 500 DPI. That frosts the surface without digging in. These are starting points to confirm on scrap material before a production batch.
Thicker 5 to 6 mm acrylic needs roughly double the energy budget: lower the speed to 5 to 12 mm/s or raise power, and always test a corner. Multiple thin passes are safer than one slow melt-prone pass.
Adding Hardware and Finishing
After cutting, pop the charms out and clear the edge burr with a gentle pass of 600 to 1000 grit sandpaper or a flame-polish with a separate heat tool if you want glassy edges. Wipe with isopropyl alcohol to remove residue.
Add the keyring through the hole, then tassels, beads, or a lobster clasp depending on the style. For a sealed printed look, a layer of clear epoxy resin on the engraved face adds depth and protects the art from scratches in a pocket.
Laser cut charms sell better when the hardware matches the theme: gold rings for weddings, silver for corporate, bright plastic for kids. Keep a small parts bin so you can finish a batch the same day it is cut.
Packaging for Sale
A bare charm in a poly bag looks homemade; a charm on a branded card looks like a product. Punch a hole in a 2x3 inch kraft card, slide the keyring on, and add a thank-you sticker. Buyers photograph it and your listing converts better.
Bundle by theme for markets: pet charms, name charms, photo charms. Keep a few pre-made bestsellers in stock and personalize the rest to order, so you never turn away a sale while you wait on a custom run.
Label the material as acrylic and note it is not a toy for under-threes because of the small ring. That one line of honesty saves returns and builds the trust that turns a one-time buyer into a repeat customer.
Keep a sample of every charm style you sell in a small binder so markets and custom calls go faster. When a customer points at a shape and says "one like that, but in blue," you already know the file, the settings, and the hardware, so the order is cut and packed in minutes instead of re-engineered on the spot.
Frequently Asked Questions
Can I laser cut acrylic without melting it?
Yes, with cast acrylic and the right speed-power balance. Cut fast enough that the edge flashes clean rather than simmering, and test on scrap so you find the point where the edge turns glassy instead of gummy.
Do I need to ventilate when cutting acrylic?
Absolutely. Acrylic fumes are irritating and the smell lingers, so run your exhaust or filter and keep the work area aired. Good ventilation also keeps the lens cleaner and your cuts sharper.
What thickness of acrylic is best for keychains?
Three millimeters is the sweet spot: sturdy enough to feel solid, thin enough for fast clean cuts and low material cost. Go to 5 mm only for chunky statement pieces.
How do I stop the engraving from looking cloudy?
Use cast acrylic, keep power moderate, and clean the lens and mirrors regularly. A dirty optic scatters the beam and fogs the frost, so maintenance is half the battle.
Why are my cut edges yellow or sticky?
The beam lingered too long or the power was too high for that speed, melting rather than vaporizing. Speed up a few mm/s or drop power slightly, and make sure the assist air is flowing to blow the melt away from the edge as it cuts.
Start your acrylic keychains laser journey with a desktop cutter that handles both cut and engrave layers in one pass; you can compare capable machines on the Redsail Laser cutter page, and for a broader brand check this CO2 laser cutter overview at https://www.hflaser.com/laser-cutter.html is worth a look.

- National hotline: +86-531-86516855/56/57
- Enterprise mailbox:sales@redsaillaser.com
- Address: Room 402E, Tower D, Yinhe Building, 2008 Xinluo Avenue, Shunhua Road Subdistrict, Jinan Area, China (Shandong) Pilot Free Trade Zone


Redsail Tech Co. © 2002-2026. All Rights Reserved.