
Why Personalized Boards Make Great Gifts and Products
A laser-engraved cutting board is one of the most satisfying first projects for a new CO2 machine owner. It is practical, it shows off your work every day in the kitchen, and it sells well at craft fairs and on Etsy because people love gifts that feel personal. A custom board with a family name, a recipe line, or a small illustration turns a plain kitchen tool into a keepsake that outlasts the occasion it was made for.
The good news is that wood engraving for boards is forgiving once you understand a few basics: pick the right wood, place the design where it belongs, control the depth, and finish it so it stays food-safe. The rest of this guide walks through each step, from choosing the blank to the final oil, so your first batch looks clean and lasts for years of real kitchen use.
Choosing the Right Wood for Engraving
Not every board material engraves the same way. Hardwoods with a tight, even grain give you the crispest contrast and the longest life, while very oily or resinous woods can scorch unevenly and resist finishing. Picking the blank is half the battle for a clean result.
- Maple is the classic choice. It is light, dense, and engraves to a warm caramel tone with good contrast. It is also the wood most food-safety guides recommend for real cutting surfaces, and it takes oil beautifully.
- Bamboo is affordable and eco-friendly, but it is actually a grass with a directional fiber that can engrave patchy. Run a test patch first and keep power moderate so you do not brown the whole zone.
- Acacia looks beautiful with its rich color variation, though the grain density changes across the board, so expect some tone variation in your engraving and choose straighter-grained blanks when consistency matters.
- Walnut and cherry engrave darker and read as elegant, but they show dust and fingerprints more than lighter woods and can look busy behind fine text.
- Birch and beech are budget-friendly and engrave cleanly, making them good for high-volume gift batches where cost per piece matters.
Avoid boards with glued-on rubber feet directly under your artwork area, and avoid composite or "end-grain with resin fill" boards where the fill burns differently than the wood. A simple edge-grain hardwood board is the safest place to start, and it is easy to source in bulk from kitchen suppliers.
Preparing and Cleaning the Board
Dust, oil, and factory residue on a new board will burn into the engraving and leave sticky spots that are hard to clean later. Take a few minutes to prep before you ever press start, because surface condition drives engraving quality more than most people expect.
- Wipe the surface with a barely damp cloth and a drop of mild dish soap, then dry it completely with a lint-free towel.
- Lightly scuff the engraving zone with a fine 320-grit sanding sponge to remove any surface sheen; this helps the beam bite evenly and reduces hot spots.
- Wipe again with a clean, dry cloth and let the board rest for an hour so any trapped moisture escapes and the wood settles flat.
- Mask the surrounding area with low-tack paper masking tape if you plan a deep engrave, to catch soot and make cleanup easier.
- Check the board for warps by laying a straightedge across it; a rocking board will be out of focus at the ends and engrave unevenly.
A clean, dry, matte surface is the single biggest contributor to a sharp, even result on a personalized board, and it costs you almost nothing but a few minutes of attention.
Placing the Design Away From Food Contact
This is the part most beginners get wrong, and it matters for safety as much as for looks. The engraved area is a groove that can trap bacteria, so for a board people will actually chop on, keep artwork on the non-working side or along the edge where a knife never reaches.
- Engrave the back or the handle end for everyday cutting boards so the food never touches the carved surface and the groove stays easy to sanitize.
- For a laser serving tray that holds dry snacks, cheese, or decor, a centered design is fine because it sees little to no knife contact and is mostly wiped rather than scrubbed.
- Keep text at least 15–20 mm from the board edge so it does not crack or chip during normal handling and washing.
- Center your layout using the machine's framing or a red-dot pointer, and double-check the board sits flat with no rocking before you lock it down.
- For charcuterie-style boards, engrave a thin border line rather than a filled area; a border reads as designed and stays shallow and food-friendly.
Thinking about where the board gets used protects both the customer and your reputation as a maker, and it is the difference between a gift that lasts and one that raises a food-safety question.
Engraving Depth, Power and Speed Settings
Most desktop CO2 tubes in the 40–60 W range handle board engraving beautifully. You are not trying to cut through the wood, only to remove a thin surface layer for contrast, so restraint matters more than raw power here.
- For light surface marking on maple, start around power 12–18% and speed 250–400 mm/s at 300–500 DPI for a clean, shallow tone.
- For a deeper, richer caramel, slow to 150–250 mm/s and raise power to 20–30%, watching closely for excess char along the grain lines.
- Bamboo likes slightly lower power (10–15%) because it burns fast and can brown the whole zone before you get the detail you want.
- Walnut and cherry need a touch more power than maple to show contrast because their natural color is already dark.
- Always run a small test patch in a corner or on a scrap of the same wood before committing to the full board; woods vary batch to batch.
A shallow, controlled engrave reads clearly, cleans easily, and keeps the board functional. Deep carving looks dramatic in photos but is harder to sanitize and more likely to collect oils over time.
Food-Safe Finishing and Aftercare
Once the engraving is done, the board needs protection. The soot from lasering leaves a thin residue in the groove, so wash it gently first, then finish with a food-safe conditioner that nourishes the wood without sealing in contaminants.
- Scrub the engraved area softly with a soft brush and warm soapy water, then rinse and dry flat on a rack so air reaches both sides.
- Apply food-grade mineral oil generously, let it soak in for a few hours, and wipe off the excess with a clean cloth.
- For extra water resistance, layer beeswax or a beeswax-mineral-oil paste on top, buffing it in with the grain until the surface feels smooth.
- Re-oil the board every few weeks of use; the engraved zone will slowly darken to a lovely patina that customers often love.
- Never use polyurethane, lacquer, or "butcher block" finishes that are not explicitly food-safe, especially on a surface that touches food.
A proper finish is what turns a raw engraved board into a product that survives a dishwasher-free kitchen life and keeps looking good through years of use.
Packaging and Selling Personalized Boards
Once you have the technique, boards are an easy product to scale because they ship flat and photograph well. A few practical touches help them sell.
- Wrap in tissue with a care card that explains the food-safe finish and how to re-oil, which builds trust and repeat buys.
- Offer a "recipe board" niche with a printed family recipe engraved alongside the name for a strong gift story.
- Bundle a matching serving spoon or a set of two for weddings and housewarmings to lift the basket value.
- Photograph the board in daylight on a neutral background so the engraving contrast reads true in your listing.
A desktop laser engraver makes small-batch personalization easy and repeatable, and boards are a low-risk way to learn the whole workflow.
Frequently Asked Questions
Q: Can I engrave a board people will actually cut on? A: Yes, but keep the artwork on the back or handle area so the carved groove never touches food, and finish with food-safe oil.
Q: Why did my bamboo board burn unevenly? A: Bamboo fibers run directionally and burn fast; lower the power to around 10–15% and run a test patch first to find the even zone.
Q: How do I clean a personalized board after engraving? A: Gently brush the groove with warm soapy water, dry it flat, then apply food-grade mineral oil once it is fully dry.
Start Your First Batch of Personalized Boards
Grab a few plain maple or acacia boards, run one test patch, and you will have gift-ready or shop-ready pieces in an afternoon. A desktop laser engraver makes small-batch personalization easy and repeatable.
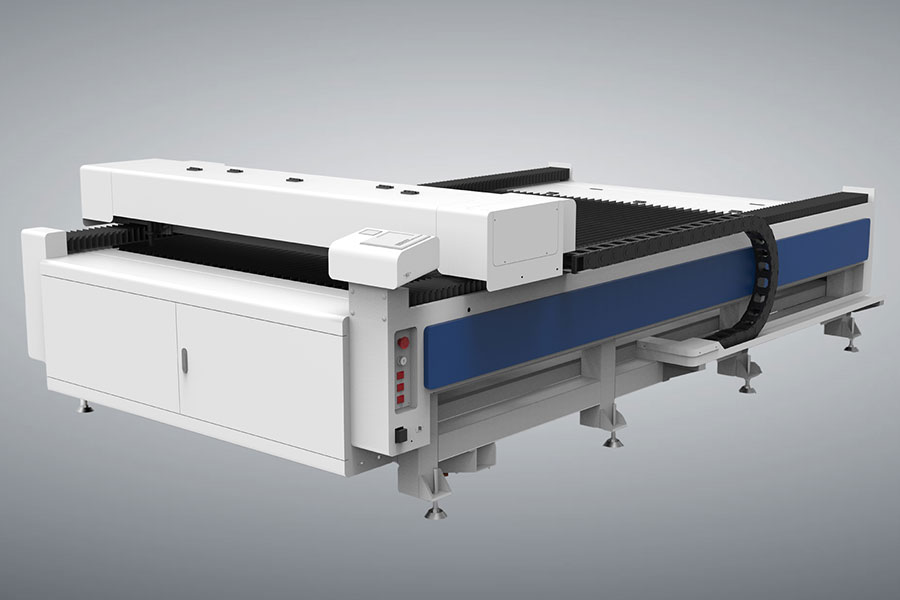
If you later need a bigger industrial flatbed, HF Laser keeps a detailed catalog of CO2 laser cutters and auto-feeding machines worth comparing.

- National hotline: +86-531-86516855/56/57
- Enterprise mailbox:sales@redsaillaser.com
- Address: Room 402E, Tower D, Yinhe Building, 2008 Xinluo Avenue, Shunhua Road Subdistrict, Jinan Area, China (Shandong) Pilot Free Trade Zone


Redsail Tech Co. © 2002-2026. All Rights Reserved.