
Wattage Is the First Big Decision
Before you buy a machine, the question every maker asks is "how many watts do I actually need?" For craft work the answer is rarely "the biggest one." More power means faster cutting and thicker material, but it also means a larger footprint, higher cost, stronger ventilation, and more amperage to plan for. The right call matches wattage to the materials and products you plan to make most often.
This guide breaks down the three common maker tiers — 40 W, 60 W, and 100 W — and shows what each one comfortably handles across wood, leather, acrylic, and gifts, so you can choose wattage with confidence instead of guessing. We also cover bed size, cooling, and the upgrade path so the decision sticks.
What 40W Handles for Makers
A 40W desktop CO2 tube is the entry point for most hobbyists and Etsy starters, and for pure engraving it is plenty. It is the smallest, lightest, and cheapest tier, which is exactly why so many makers begin here.
- Engraving: excellent on wood, leather, acrylic, and coated metals (with marking spray) at speeds around 200–400 mm/s with crisp detail.
- Cutting: clean through 3–4 mm plywood or acrylic; push to 5–6 mm with slow, patient passes and good airflow.
- Best for: signs, tumblers, jewelry, leather stamps, and light gift batches where volume is modest.
- Limit: thick hardwood and acrylic over about 6 mm get slow and may need multiple passes that risk charring.
- Footprint: usually fits a desk, which is a real advantage if your craft space is a corner of a room rather than a shop.
If your whole plan is engraving and the occasional thin cut, a 40W craft laser keeps the budget and the bench space low while still shipping real, sellable products from day one.
Where 60W Earns Its Keep
The 60W tier is the sweet spot for many small businesses because it widens both speed and thickness without jumping to an industrial size or a dedicated room. It is the tier most makers outgrow into rather than out of.
- Engraving: faster same-quality marks, so a 50-piece batch takes noticeably less time than on 40 W and stays consistent across the run.
- Cutting: comfortable through 6–8 mm wood and acrylic in a single pass at moderate speed, with cleaner edges than low power allows.
- Leather: cuts veg-tan up to roughly 3–4 mm and engraves beautifully with less scorching than a low-power tube produces.
- Best for: sellers doing daily orders, layered SVG wall art, and thicker acrylic keychains where edge quality sells the piece.
- Throughput: the extra speed means you can take larger custom orders without the machine becoming the bottleneck.
For most makers who want to grow from hobby to side business, 60W removes the "too slow" ceiling without the 100W footprint and power draw.
When 100W Makes Sense
A 100W tube is a serious step up in both capability and shop requirements. It is not for everyone, but it solves specific problems for production-minded sellers and shared spaces.
- Cutting: powers through 10–12 mm acrylic and wood in one or two passes, great for chunky signs, boxes, and jigsaw-style joints.
- Speed: high throughput on repetitive gift runs where time directly equals money and deadlines are tight.
- Tradeoffs: bigger machine, stronger exhaust, and more care needed so thin materials do not flash over or catch from excess heat.
- Best for: production sellers, makers cutting thick stock daily, and makerspace use where many people share one fast machine.
- Power draw: plan for the amperage and the chiller or cooling needs before you commit to this tier in a home setting.
If you mostly engrave thin items, 100W is overkill and costs you floor space and electricity you will not use. Match the watt to the work, not to a fear of outgrowing the machine.
Bed Size vs Power: Don't Confuse the Two
Buyers often tie power to bed size, but they are separate choices. A 60W tube can sit in a compact desktop or a large flatbed, and a big bed with low power just means slow cutting over a wide area you rarely fill.
- Pick bed size from your largest common piece: a 300x500 mm bed covers most gifts; 600x900 mm and up suits signs and panels.
- Pick power from your thickest common cut and your daily volume, not from the bed dimensions you happen to like.
- A smaller, higher-power machine often beats a huge, low-power one for speed and for the quality of thick cuts.
- Check that your exhaust and amperage can support the tube you choose before you commit, because cooling scales with wattage.
- Remember you can always cut a big piece in sections on a small bed, but you cannot add wattage you do not have.
Thinking of bed and power as independent lets you build a machine that fits both the work and the room you actually have.
Cooling, Ventilation and Duty Cycle
Higher wattage is not free; it asks more of the rest of your setup, and ignoring that is how beginners end up with overheating tubes and smoky rooms.
- Cooling: 60W and up usually want a proper water chiller rather than a passive bucket, especially in warm rooms or long runs.
- Ventilation: every tier needs extraction to a window or outside, but 100W pushes far more smoke and needs a stronger inline fan.
- Duty cycle: a 40W tube can run lighter all day, while 100W cuts hot and benefits from pauses so the tube and power supply stay cool.
- Air assist: helps at every level by blowing away flare-ups; it matters more as power and cut thickness climb.
- Space: budget for the machine plus the chiller, the extractor, and a safe clearance around all of it.
Plan the support system with the tube and the result stays reliable instead of temperamental.
Matching Wattage to Your Craft Niche
The fastest way to decide is to map your niche to a tier, because your products tell you the thickness and volume you actually need.
- Name signs and tumblers: 40–60 W is ideal; engraving dominates and cuts are thin, so speed is the only real upgrade.
- Acrylic jewelry and keychains in volume: 60 W for speed and clean edges up to 8 mm stock without multiple passes.
- Leather goods and stamps: 60 W handles thickness and detail well and scorches less than entry-level tubes.
- Wooden boxes, thick signs, daily production: 100 W pays off in time saved and in single-pass thick cuts.
- Just exploring: start at 40 W and upgrade the tube later if your orders grow past what it can comfortably handle.
Most tubes are swap-in replaceable, so a desktop laser engraver can grow with you rather than being discarded the moment you scale up.
Cost Versus Capability
Wattage tracks with price, but the smart buy is the tier you will actually use rather than the biggest you can afford. A 40W machine costs far less and runs on a normal outlet, while 100W adds the tube, a chiller, stronger extraction, and often a dedicated circuit. If your products are mostly engraved gifts under 6 mm, the extra spend on 100W sits idle; if you cut thick stock daily, the speed pays it back fast. Budget for the whole system, not just the tube, and the right tier becomes obvious from your order list.
Frequently Asked Questions
Q: Is 40W enough to start an Etsy shop? A: For engraving and thin cuts up to about 4–6 mm, yes; many sellers start at 40W and upgrade the tube later as order volume grows.
Q: What is the real difference between 60W and 100W? A: Mainly cut thickness and speed; 100W handles 10–12 mm stock and high volume, while 60W covers most maker needs up to ~8 mm.
Q: Should I buy the biggest bed I can afford? A: Only if your pieces need it; bed size and power are separate, and a smaller higher-power machine often cuts faster than a huge low-power one.
Pick the Watt That Fits Your Work
Match power to your thickest cut and daily volume, not to fear of outgrowing the machine — tubes are upgradeable. Browse the economical laser engraver range to find a tier that fits your bench and your budget.
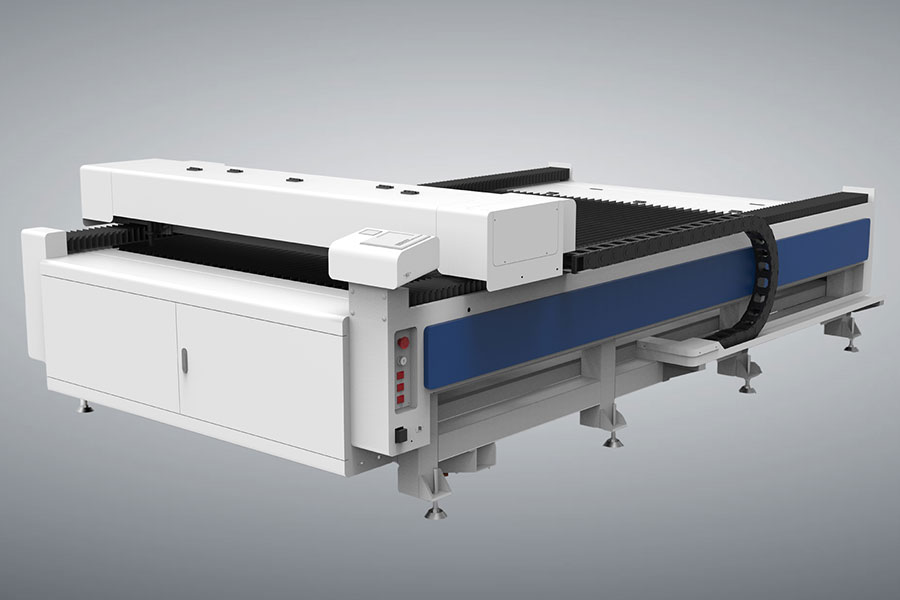
If you later need a bigger industrial flatbed, HF Laser keeps a detailed catalog of CO2 laser cutters and auto-feeding machines worth comparing.

- National hotline: +86-531-86516855/56/57
- Enterprise mailbox:sales@redsaillaser.com
- Address: Room 402E, Tower D, Yinhe Building, 2008 Xinluo Avenue, Shunhua Road Subdistrict, Jinan Area, China (Shandong) Pilot Free Trade Zone


Redsail Tech Co. © 2002-2026. All Rights Reserved.